Build Your First Agent
In this section, we will walk you through the steps to create an agent in Sequentum Cloud to extract data from a books website, run the agent, and review the exported data.
Choosing a Start URL
Start by login to Sequentum Cloud and selecting New Agent to open the Agent Editor.
The Start URL is the place where you begin data collection and corresponds to the starting point of your web data extraction agent.
In the following sections, we will use the Book Site website for our example.
https://books.toscrape.com/
We start by pasting the start web page URL from the target website (https://books.toscrape.com/ ) into the Sequentum Cloud Address Bar.

In the next section, Select the Content to Capture, we will continue to use the Books to Scrape website data for our example.
Select the Content to Capture
After loading the Start URL into Sequentum Cloud, you can begin selecting the data you want to capture and building your agent. Move your mouse pointer over elements on the webpage in the Agent Editor to see items highlighted with a pinkish background color, indicating that they can be selected. (For a deeper dive, see the manual section on Selection Techniques)
To capture a list of items, such as all the books on the page, click on the first book to select it. Then, hold the Shift key and click on the next item in the list. This action will automatically select all the books that share the same XPath class, and you will see all the items highlighted on the page. Additionally, the count of selected elements will appear in the bottom left corner of the Editor window, confirming your selection as shown in the screenshot below. For more advanced techniques, refer to the manual section on Selection Techniques.
Once all the books are highlighted, look at the bottom frame as shown below and click on the Extract button. This will add a new List command along with Content command to capture the selected content. These commands will then appear in the Agent Explorer panel on the left side of the screen, allowing you to manage and review the extraction process.
NOTE: Hit Enter key to ensure you save the changes after adding command(s).We can now assign meaningful names to the List and Extract commands. In this example, rename "List Text List" to "Books" and "List Text" to "Title" to better represent the captured data. Remember to press Enter key to save your changes.
Moving forward with the extraction process, we will now capture the price. Simply click on the price text and then click on the Extract button. You will notice that the extracted price is displayed along with the selection count.
Clicking the Extract button will add a new Extract command to the Agent Explorer panel. Rename this command to "Price" for better clarity and press Enter key to save the change.
Here we see that the Price text contains the currency symbol, which we can exclude using a Regular Expression. To apply this transformation, first select only the price text and click on Extract Selected, then click on Save Selection to confirm the selection.
Next, we will extract the Stock information. Simply click on the stock value to select all the listed elements, then click on the Extract button.
After the Extract command for Stock is added, rename it to "Stock" and press Enter key to save the change. Sample values for the selected elements will also be displayed.
To extract the Image URL, repeat the steps from step 8: click on the image to select it, then choose Extract. After extraction, rename the command to "Image URL" and press Enter key to save the change.
Now, to add pagination for extracting the next pages, scroll down to the next page button, click on it, and then click on the Pagination command. Finally, click on the Save Selection option to save the pagination settings.
The Pagination command is now added above the Books List in the Agent Editor. This ensures that the agent will follow the pagination and continue extracting data from the next pages.
We have captured all the required fields. Now, to ensure that the agent is capturing the data correctly, click on the Preview button to start the agent's execution and verify the extracted data
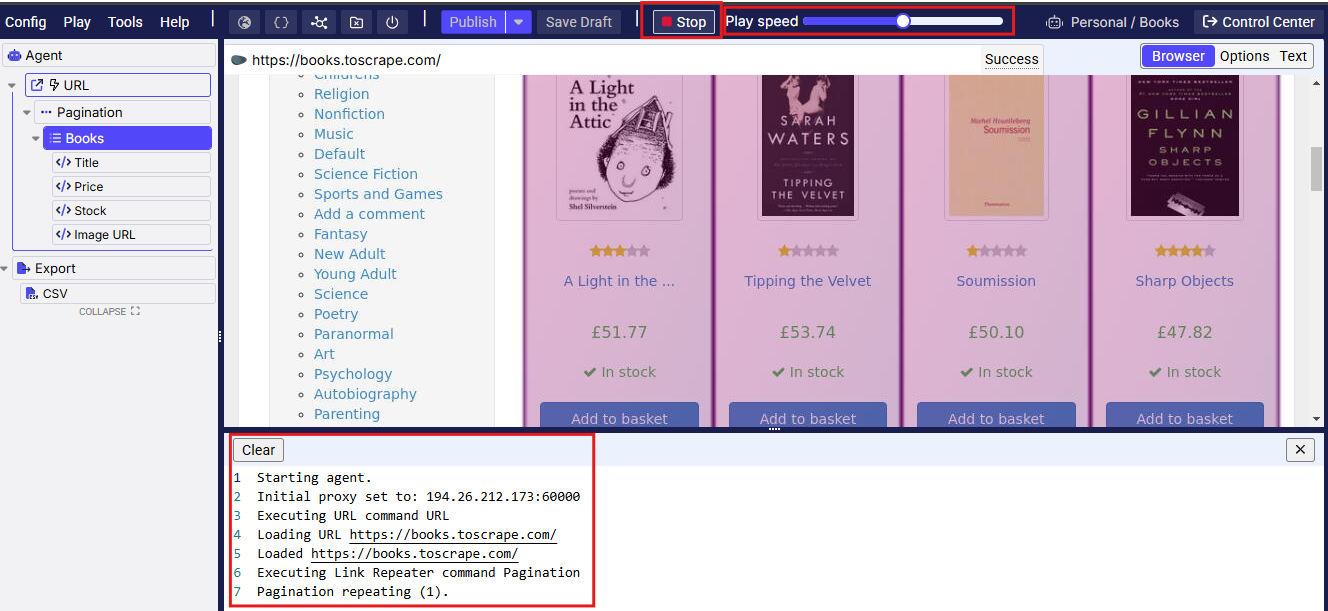
During the agent's Play, you can control the speed according to your preference. The logs are visible at the bottom, providing real-time information on the agent's actions. You can click the Stop button, to stop the play execution.
Once the Play stops, you can view the extracted data at the bottom under the Data section. This will display the results from the agent's play, allowing you to verify that the data was captured correctly.
Now, we can set Success Criteria to ensure that if the agent extracts fewer records than the specified minimum count, the agent will fail. After configuring this, we can publish the agent and execute a full run.
Click on the Save button in the right side panel and provide a name for your agent. After entering the name, click on the Save button in the popup to finalize the process.
Click on Control Center, where you can start a run for the agent.
Click on the Sequentum icon dropdown menu and select the Exit to Dashboard option. From the dashboard, you can start a run for the agent.
Click on Run to configure the parameters for running the agent.
Click on Run Now to trigger the agent run immediately. This will start the extraction process based on the configured settings and parameters.
Once the run is completed, click on the Square icon on the right side to view the output file. This will allow you to access the data extracted by the agent during the run.
Click on the CSV file link to view the data in a new browser window, or you can click on the Download icon to download the file to your local machine for further use.
Here, we can see the output results of the agent run, displaying the extracted data as expected. This confirms that the agent has executed correctly and successfully captured the necessary information.
Congratulations, you have fully completed your first agent! In this guide, we learned how to build our first agent, setup a run. If you have any additional questions, please reach out to us at support@sequentum.com


