Integration with Snowpipes
Snowpipe is a feature in Snowflake that enables the continuous ingestion of data into Snowflake tables in near real-time. It automates the process of loading data from external storage locations, such as Amazon S3, Google Cloud Storage, or Azure Blob Storage, into Snowflake as soon as new files are detected.
Snowpipe is highly cost-efficient in scenarios where:
You have frequent, or real-time data loads.
You want to avoid the overhead of managing compute resources and paying for idle warehouses.
Your data arrives at irregular intervals, and you want to minimize costs by paying only for the compute resources used during actual data ingestion.
How to set up Snowpipes (UI)
Stage your data: Ensure that your data is stored in a supported external storage location. In this example we will be using S3 Buckets.
Create a stage: Create a new stage and select an existing Amazon S3 location.
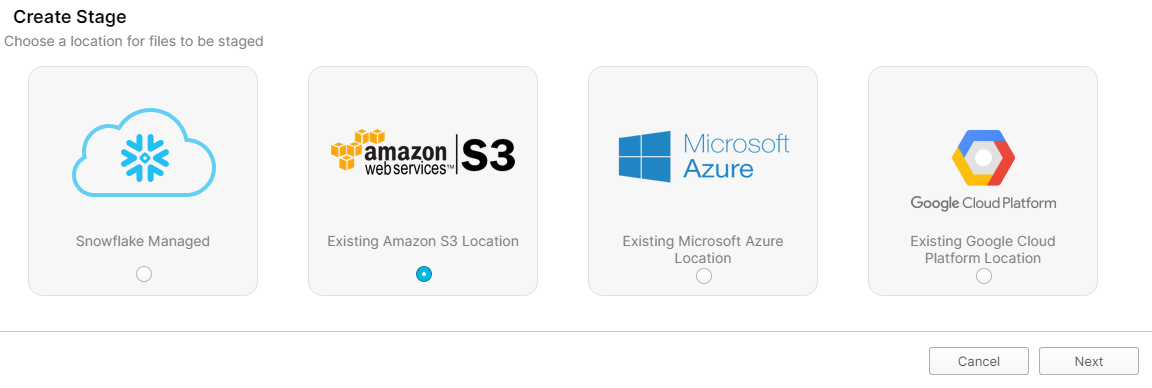
Select “Existing Amazon S3 Location”
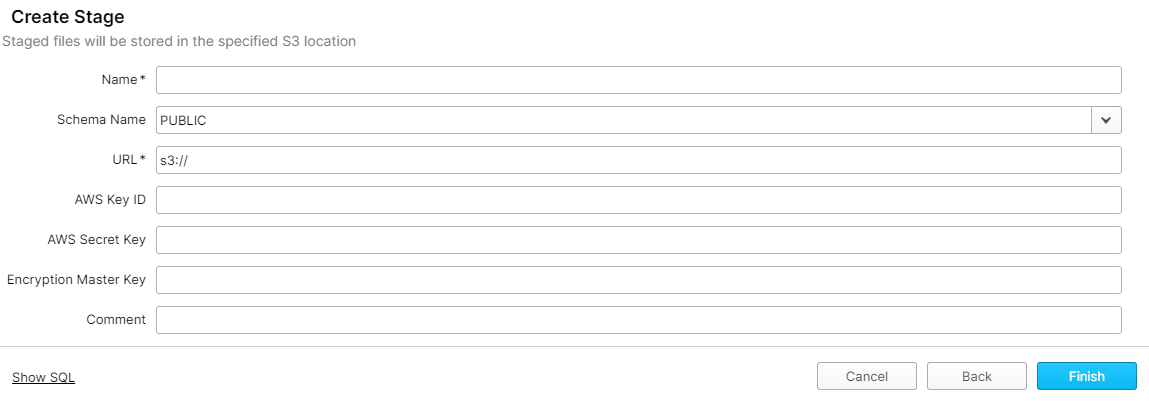
Create a new stage with your Amazon S3 info
Create a pipe: Create a new pipe and select the schema of your dataset.
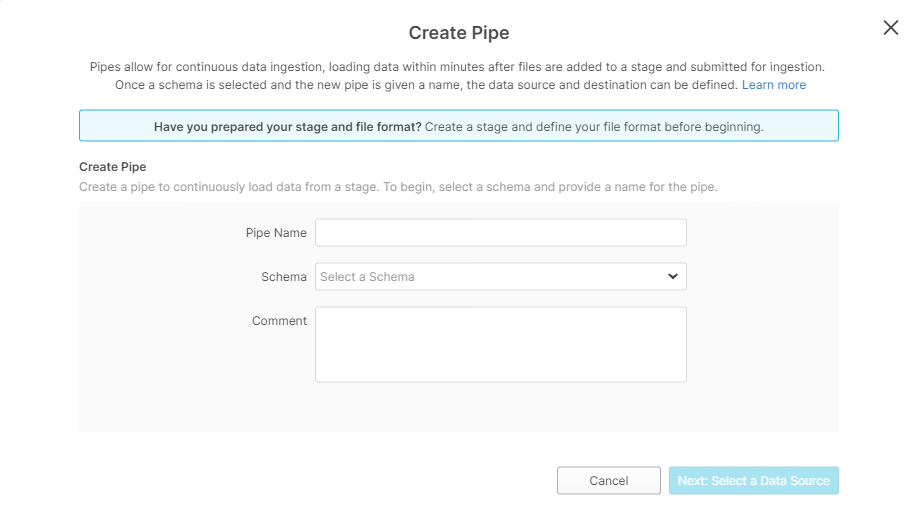
Select schema of your dataset
Enter in a pipe name, schema and comment (optional) and press “Next: Select a Data Source”
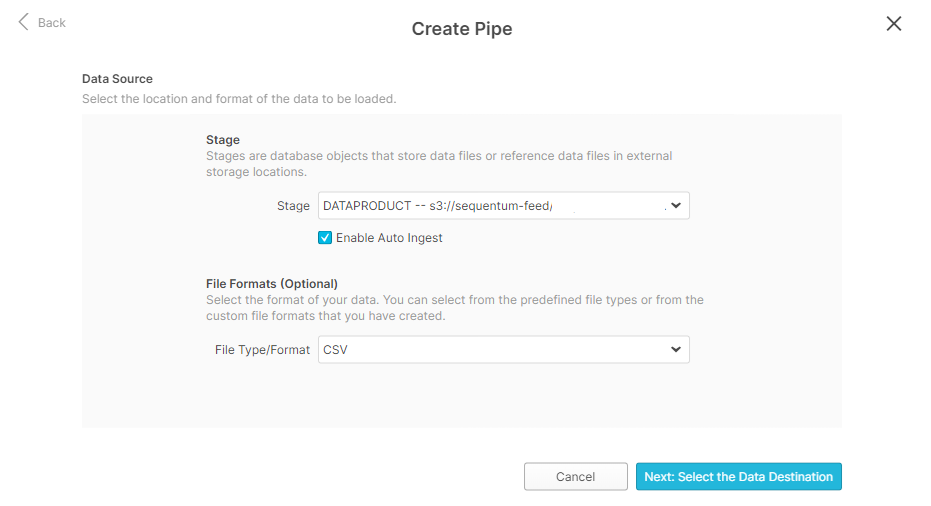
Selecting a data source
Select the stage that we previously configured and select “Enable Auto Ingest”. Also select the file formats of the file that will be uploaded to S3 (optional). Press “Next: Select the Data Destination”
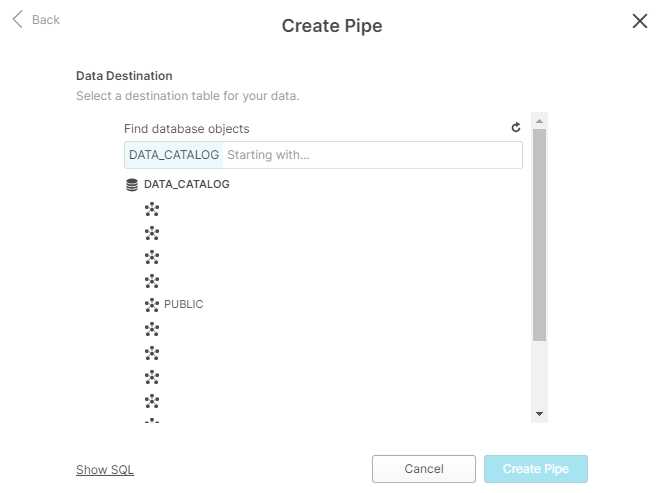
Selecting a data destination table
Select the targeted data where your data will be uploaded to and press “Create Pipe”.
Monitor Snowpipes: Click on your “Pipes” tab to view all Snowpipes.

Successfully created snowpipes
Snowflake's monitoring tools can also be used to track the progress and health of your Snowpipes.
You can query the COPY_HISTORY view to check the status of files that Snowpipe has ingested within a specified timeframe (up to the last 14 days).CODESELECT * FROM TABLE(INFORMATION_SCHEMA.COPY_HISTORY( TABLE_NAME => 'your_table_name', START_TIME => DATEADD('hour', -24, CURRENT_TIMESTAMP()) -- last 24 hours ));
The LOAD_HISTORY table function provides information about all the files that were processed by Snowpipe. You can use this function to monitor whether files have been ingested and processed successfully.CODESELECT * FROM SNOWFLAKE.LOAD_HISTORY WHERE PIPE_NAME = 'your_pipe_name' AND LOAD_TIME > DATEADD('hour', -24, CURRENT_TIMESTAMP());
You can use the PIPE_USAGE_HISTORY table to monitor how your pipes are performing over time. This view provides detailed information about Snowpipe usage, such as the number of files loaded and bytes processed by the pipe.CODESELECT * FROM SNOWFLAKE.ACCOUNT_USAGE.PIPE_USAGE_HISTORY WHERE PIPE_NAME = 'your_pipe_name' AND START_TIME > DATEADD('day', -7, CURRENT_TIMESTAMP());
How to set up Snowpipes (Workspace)
Workspace can also be used to create Snowpipes if the user doesn’t want to navigate through the Snowflake UI. Below is an example query the user can run to create new Snowpipes:
CREATE OR REPLACE PIPE examplepipe
AUTO_INGEST = TRUE
AS
COPY INTO example_table
FROM @example_stage
FILE_FORMAT = (TYPE = 'CSV');
Advantages of using Snowpipes:
Integrating with Snowpipes for your Snowflake uploads provides the following advantages and is highly recommended:
Reduced Latency: Data is ingested almost as soon as it arrives, which allows the user to query near real-time data.
Minimal Overhead Management: The automatic file detection and ingestion process reduces the need for managing and scheduling every data load job.
Scalability: Snowpipe leverages Snowflake’s scalable compute resources to efficiently load data even in high-throughput environment.
