Organization's User Screen
An Organization is a collection of users. How you set up your organization, depends on how you want to define your workflow and organize your users.
Users:
A user can belong to only one organization. You can not assign the same user to multiple organizations.
User Page:
Navigate to Organizations -> Users Tab
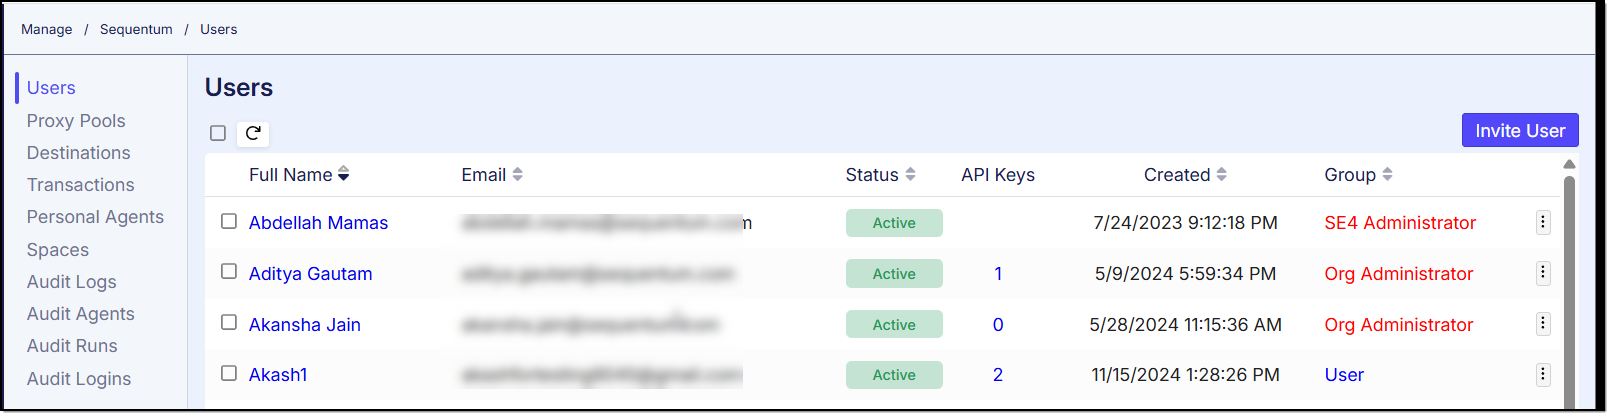
This displays the list of users related to this organization.
This user screen facilitates you with the following operations:
View the list of users along with detailed information such as Full Name, Email Address, Status and more as shown below:
Invite User:
To invite a user, you need to click on the “Invite User” button on the top right of the screen:

It will take you to a new screen where you will have to enter the user’s email, Group and authentication type:
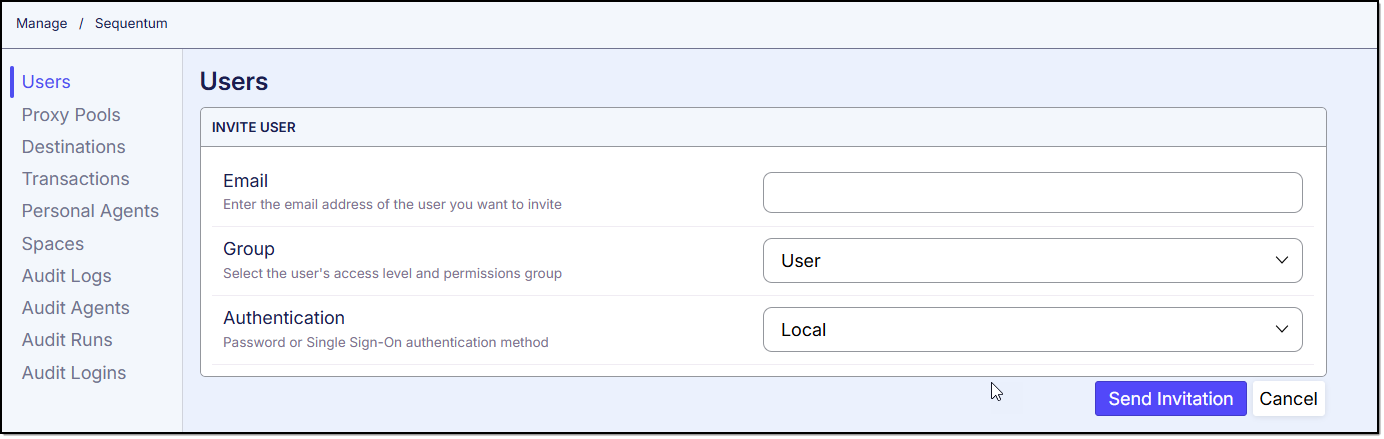
Here, the authentication method is set to 'Local,' meaning the user can log in using the email ID and password provided by the administrator.
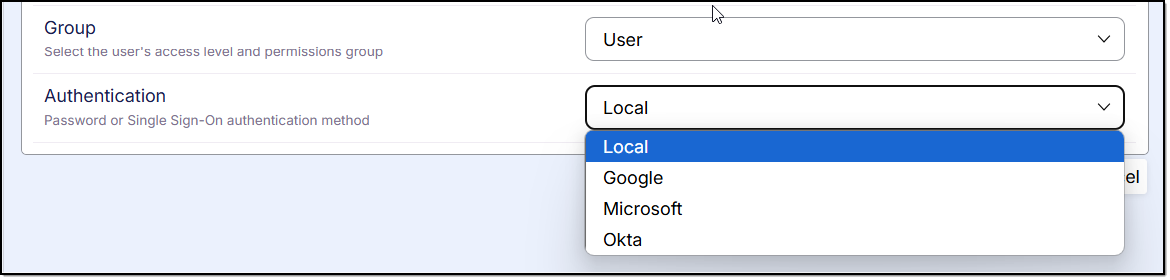
Similarly, you can select the group by clicking on the Group drop down box as shown below:
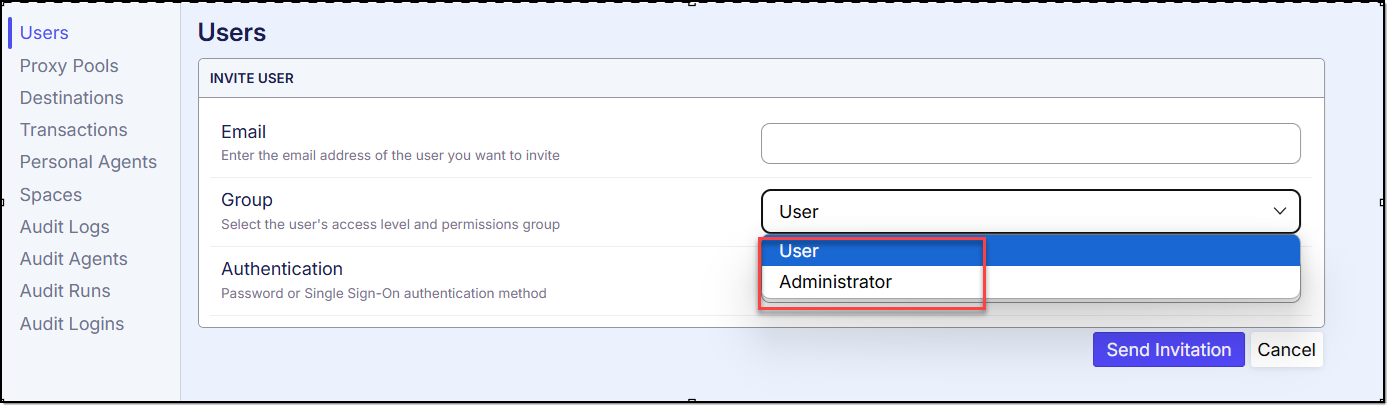
User: A 'User' has fewer privileges compared to administrators within the system. While the User can create agents, set up runs, and view versions and run history, they do not have access to the Organization or Usage options.
Administrator: The Administrator role has significantly more privileges than the User role. An Administrator can create agents, set up runs, and view version history. Additionally, they have access to the Organization and Usage options, which allow them to manage users within the organization, proxy pools, create and update destinations and view usage details.
After entering all the required details, Click on the button “Send Invitation“ to invite the user.

An email will be sent to the invited user with a link to accept the invitation. Upon clicking the link, the user will be redirected to the registration page, where they need to provide information such as Full Name, Password, and Confirm Password to complete the registration process.
EDIT User
There are two methods to edit the user:
Method 1} By going through the user context menu by clicking on triple dots available in right side and then selecting the “Edit” option:

Method 2} By clicking on the name of the user:

Both methods will navigate you to a new screen where you will see the details of the user already filled in:
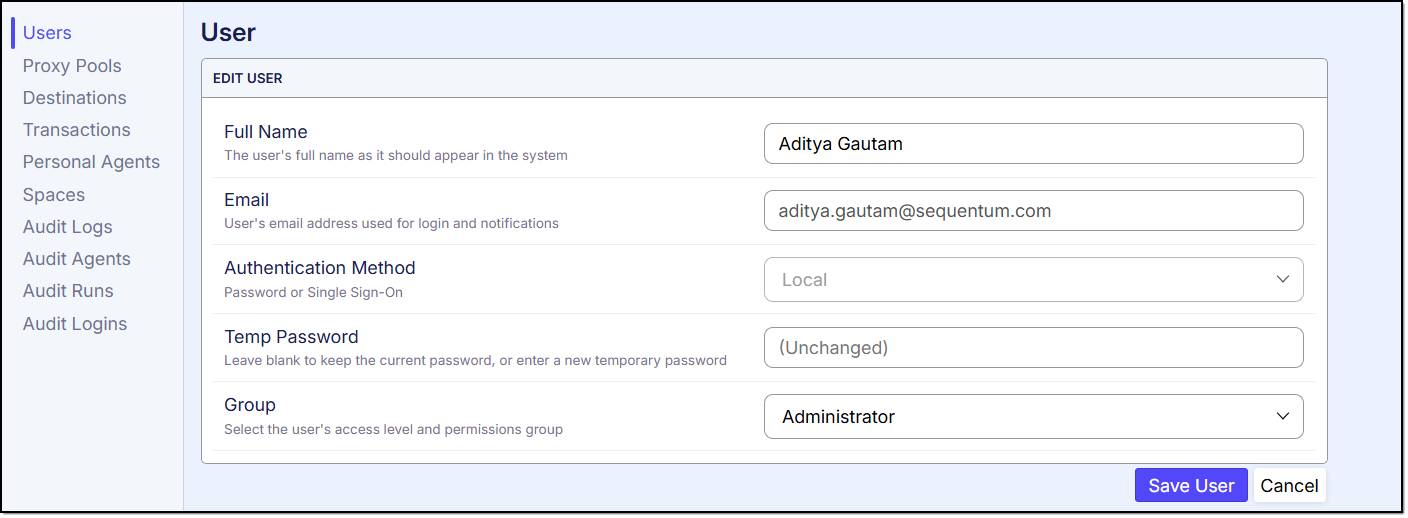
You can update the user details by modifying the text fields and clicking on the 'Save User' button. If you don't want to change the password, simply leave the password field blank.
Multi-factor authentication:
The Multi-Factor Authentication (MFA) feature on Sequentum Cloud has been implemented at the user level, ensuring that the user is required to authenticate their credentials for enhanced security.
This functionality is available on the 'Edit User' page and can be enabled by selecting the checkbox as shown below:
When multifactor authentication (MFA) is enabled for a user, an additional step is added to the login process to enhance security. After entering their username and password, the user will be required to provide a unique authentication code. This code is typically generated by an app (such as Google Authenticator or Authy). The user must input this code to verify their identity and successfully complete the login process. Without the correct authentication code, access will be denied, even if the password is correct.
Note:
During the first login, the user will receive a QR code that needs to be scanned using an authenticator app. Once scanned, the user will receive a 6-digit authentication code on their Android device, which they must enter to complete the login process.
User Deletion: Similar to ‘Edit User’, we have below two methods to delete the user:
Method 1} By going through the user context menu by clicking on triple dots available in right side and then selecting the “Delete” option:

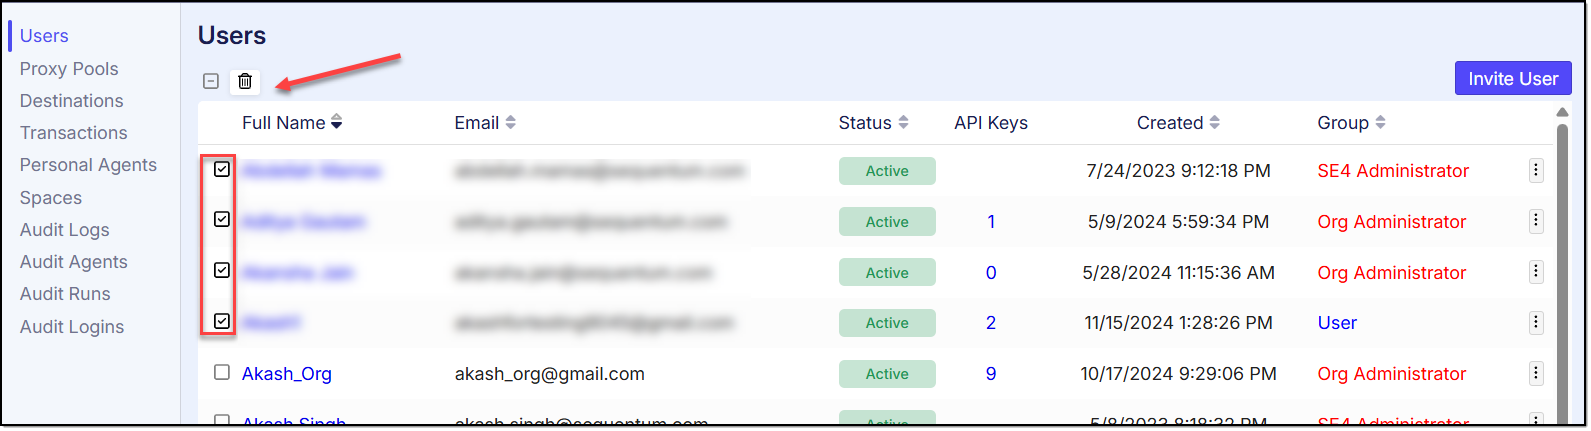
Method 2} By selecting the specific user and clicking the “Delete” icon on top:

A confirmation popup will appear and you can proceed by clicking 'Delete' to confirm your decision to delete the selected user.

Although the user is not hard deleted and can be recovered by the Administrator.
Multiple Users Deletion:
To delete multiple users, you need to select the specific users and then click the “Delete” icon on top. You will receive a popup to confirm your decision, you can proceed by clicking “Delete”: