Proxy Pool
Proxies are an important part of web scraping operations to ensure anonymity and avoid website blocking. Sequentum Cloud allows you to configure proxy pools. A proxy pool is a list of one or more proxy pools.
This Proxy pools screen allows you to:
View a list of Proxy Pools for your organization
Create Proxy Pools
Edit Proxy Pools information
Delete Proxy Pools (one or multiple at a time)
Search by Proxy Pool name
Proxy Pools Screen:
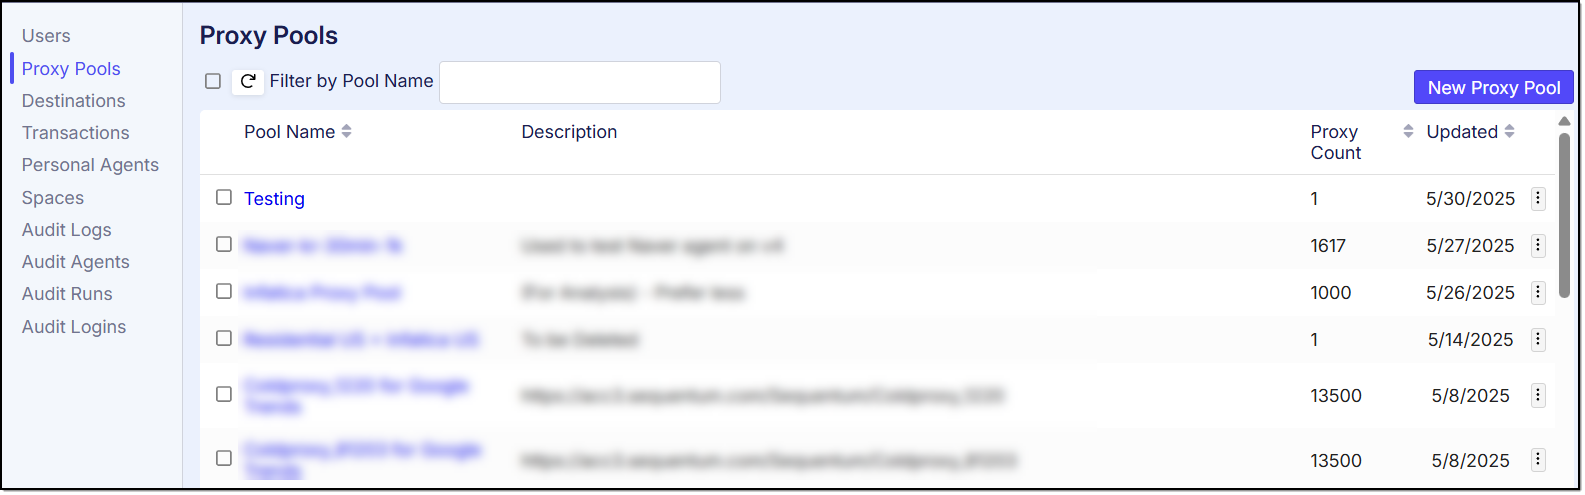
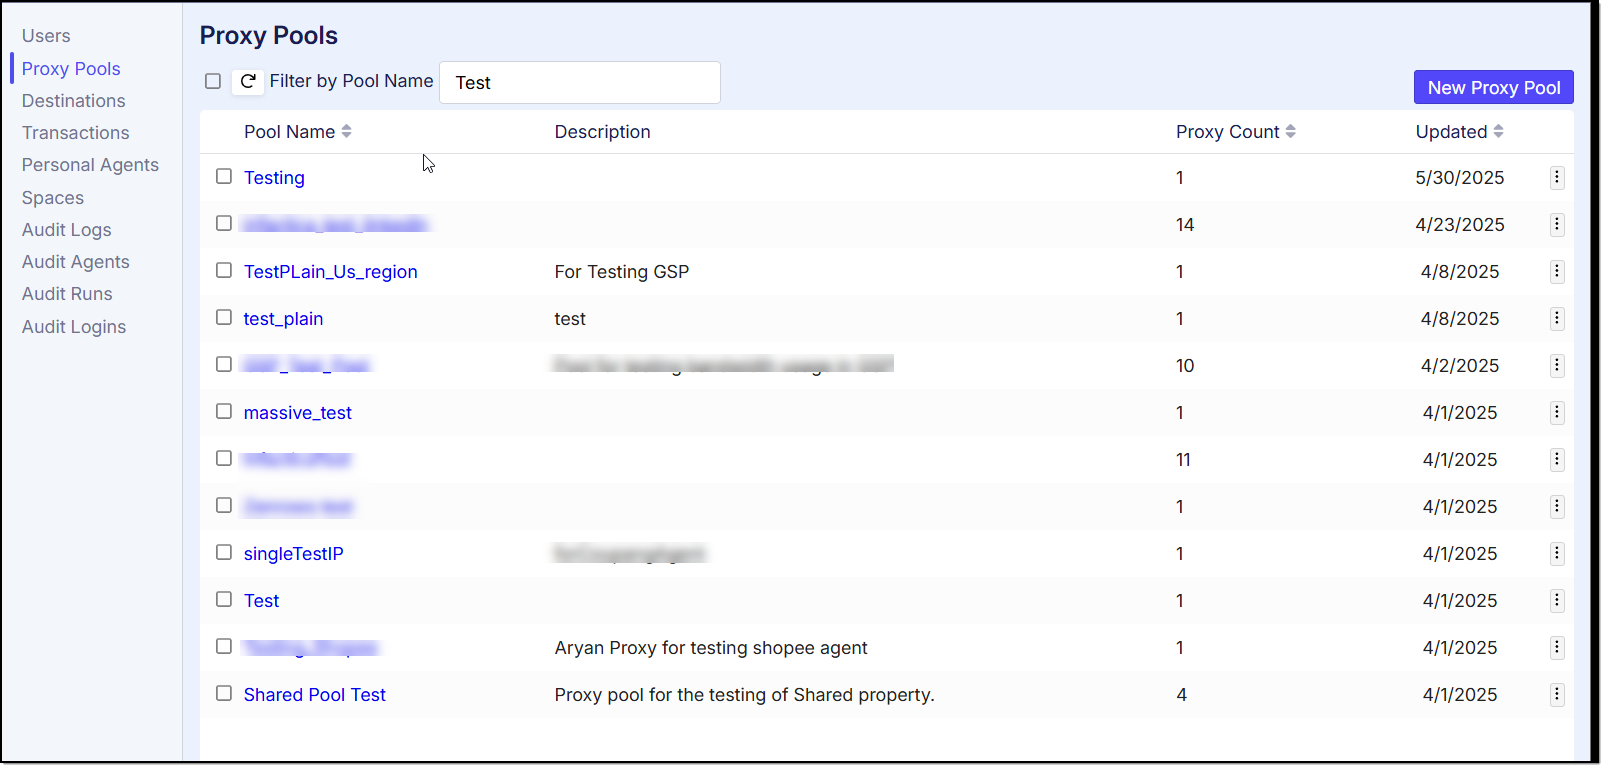
This screen allows you to view a list of your organization's Proxy Pools with their details (Pool Name, Description, Proxy Count, Updated Date)
Search by Proxy Pool name
This “Filter by Pool Name” text search box allows you to search Proxy Pools by name:
Proxy Pool Creation
To add a new proxy pool, click on the ‘New Proxy Pool’ option and it will navigate to a ‘Add New Proxy’ page where you will have to enter the Proxy Pool’s name, description and a list of proxies:

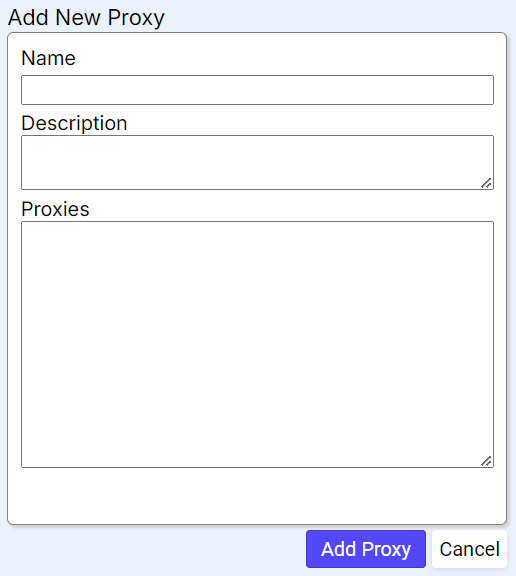
After entering the details, click the button “Add Proxy“ to create the Proxy Pool.
Proxy Pool Editing
There are two methods to edit the proxy pools:
Method 1} By going through the proxy context menu by clicking on triple dots available in right side and then selecting the “Edit” option:
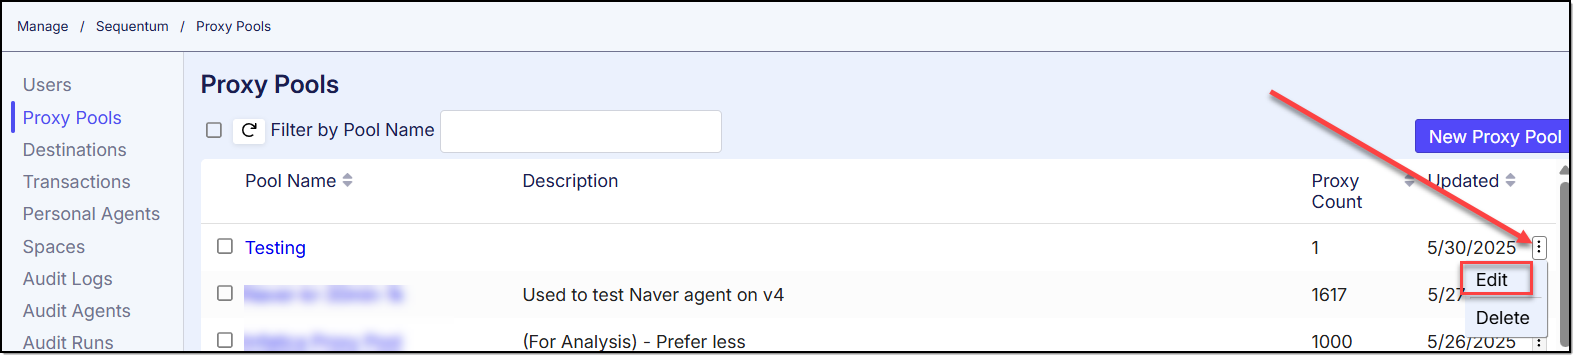
Method 2} By clicking on the name of the Proxy name

Both methods will take you to a new screen where you will see the details of the Proxy Pool already filled in:
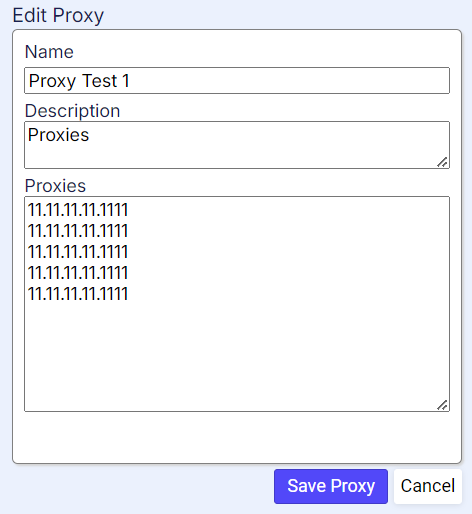
You can change the Proxy Pool details by updating the text boxes and clicking the button “Save Proxy”.
Kindly note, the proxy IP addresses must contain both IP address and port in the format IP:port. An “@” separated username and password can be added if the proxy requires user authentication in the format username: password. For example:
<username>:<password>@<host>:<port>
Proxy Pool Deletion:
There are also two methods to delete the proxy pools similar to the EDIT proxy:
Method 1} By going through the proxy context menu by clicking on triple dots available in right side and then selecting the “Delete” option:

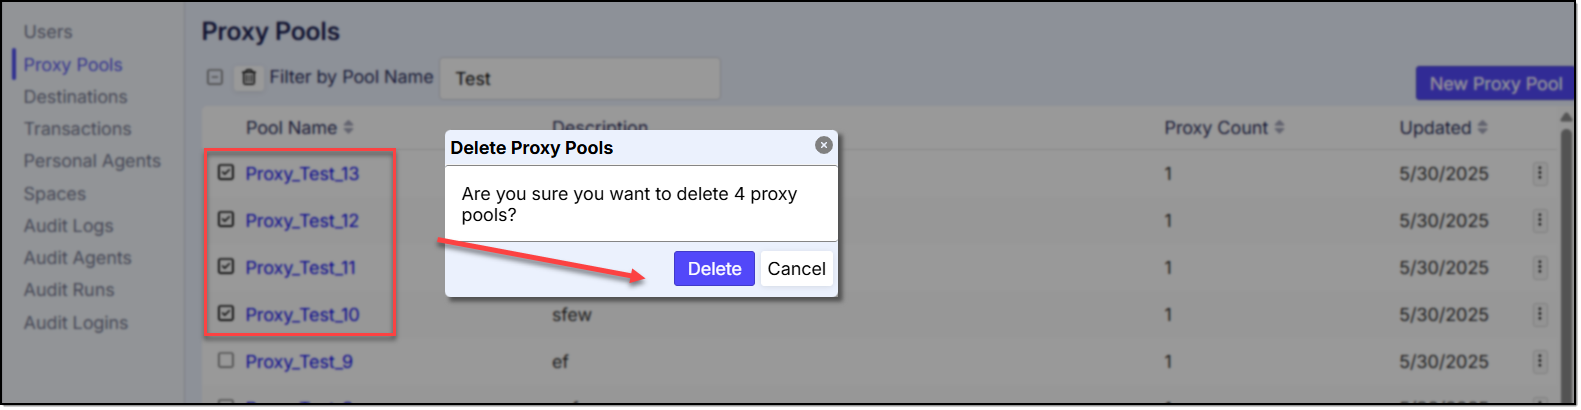
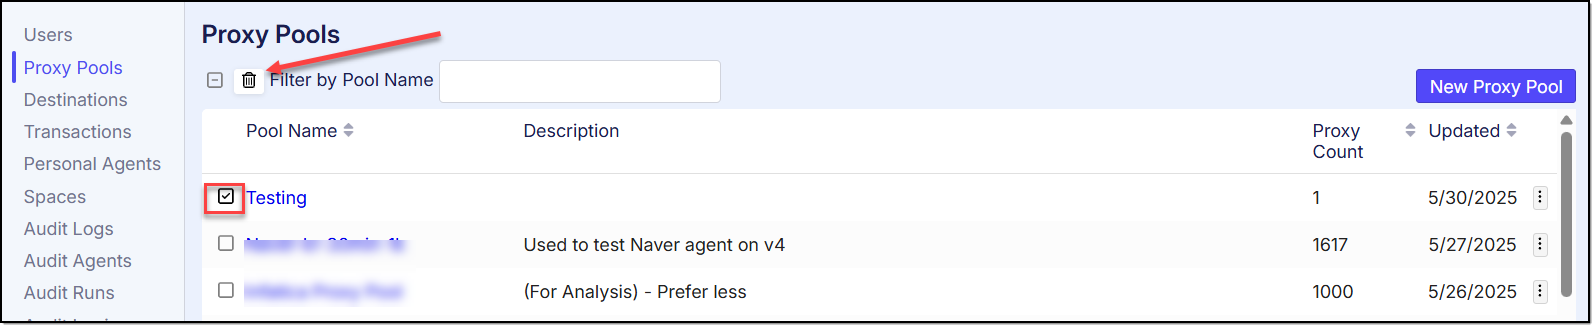
Method 2} By selecting the specific proxy and clicking the “Delete” icon on top:
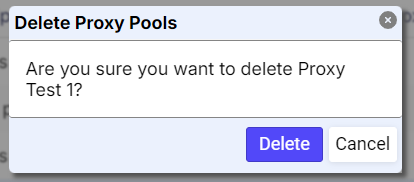
A confirmation popup will appear and you can proceed by clicking 'Delete' to confirm your decision to delete the selected Proxy.
Multiple Proxy Pools Deletion:
To delete multiple Proxies, you need to select the specific proxies and then click the “Delete” icon on top. You will receive a popup to confirm your decision, you can proceed by clicking “Delete”: