Data Value Command
The Data Value command is designed to extract data from a provider and save it to a specified data output. This command can efficiently retrieve values from various data provider commands such as URL commands, Data List or other commands.
The Data Value Command is located under the Extract icon in the command palette (refer below snapshot)

The screenshot below shows an example where the Data Value command where it can be used:

In order to make the optimum use of the ‘Data Value’ command, we can configure the options as shown in the below screenshot, as per the user requirement.

Command Configuration
The configuration screen for the Data Value command has three tabs viz. Browser, Options, and Text. Use the Browser tab to select command XPath and apply selection transformations. Use the ‘Options’ tab to set the command name and other command properties. Use the Text tab to navigate to the text of the agent where the command part is present.

Command Properties
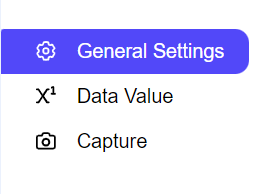
On the Options tab of the command, we have three options:
General Settings
Data Value
Capture
General Settings → General command settings
These settings allow you to rename the command, add comments for clarity, and enable or disable the command as needed.
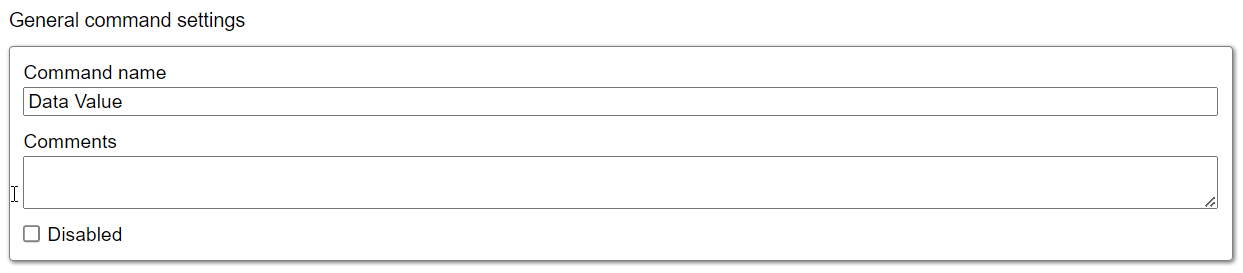
Command name: This property specifies the name of the command.
Comments: Provides a field for entering metadata or a brief description regarding the command. These annotations are used internally to provide context for developers or team members. Comments are not part of the exported data and are only used for documentation purposes within the configuration.
Disabled: This checkbox allows the user to disable the command. When checked, the command is ignored during execution. By default, it is unchecked.
Data Value → Data value input
In this section, you can input data into the Data Value command using the available options. This functionality allows you to select and utilize data from various sources, such as the data list.
Data : This option allows you to designate the source of the data which you want to use. All the available options to input the data are described below:
Data List: This option allows you to input data from the Parent data list command. You must select the specific Data list and the name of the sub-command or column from which you wish to retrieve the data. The Transformation option is also available for further customization.
Example shown in the screenshot below:

Command: This option enables you to use the Parent command or the Parent's Parent command as the source of data for the Data Value command. The Transformation option is also available for further customization.
Agent Parameter: By selecting this option, you can utilize the input parameters as the data source for the Data Value command. The Transformation option is also available for further customization.
Example shown in the screenshot below:

Action Result : In Action Result option, you will use the various action results as the source of the input data .There are several action Results options available in this settings which are explained below:
Page Html : This provides the Html Page as the input for the data value command. The Transformation option is also available for further customization.
Page Url: This provides the Page URL as the input for the data value command.The Transformation option is also available for further customization.
Is Error: This option returns false as the Input data for the data value command.The Transformation option is also available for further customization.
Page Url File Name: This provides the Page URL File Name as the input for the data value command. The Transformation option is also available for further customization.
Page as Pdf File : This provides the Page as Pdf File as the input for the data value command.
Proxy: This displays the currently running proxy for the command. The Transformation option is also available for further customization.
Return Code: This shows the status code for the command indicating whether it was executed successfully.
Static Value: This option enables you to manually input data into the Data Value command, allowing you to set a fixed value. This flexibility ensures that you can specify exact data as needed. Additionally, the Transform option is available for further customization if needed.
Script: This option allows you to input values into the Data Value command using a script. You can write a custom script in any of the supported languages, such as Regex, JavaScript, C#, or Python. This functionality enables you to input both static and dynamic values.
Example shown in the screenshot below:

Capture → Capture Settings

Content Type: The Content Type setting is a crucial feature that allows you to specify the format of the data which you have extracted. By selecting the appropriate data type, you ensure that the extracted information aligns with your specific needs and can be effectively utilized for various purposes. Here’s a detailed overview of the available options:
Text: All content will be captured as Short Text by default. Short Text content can be up to 4000 characters long.
Long Text: Long Text content is used to capture information that exceeds the 4000-characters. It allows for more extensive data collection, accommodating larger amounts of information without the constraints of character limits.
File: It includes documents, images or any other type of file, making it versatile for various data needs.
Integer: A whole number.
Float: A floating point number.
Date: Select this option if extracted date values are not associated with time.
Time: Select this option if extracted time values are independent of dates.
Date & Time: This option combines both date and time values providing a complete timestamp.
Boolean: A value that can be true or false. Boolean values are stored as 1 or 0 integer values.
Big Integer: A 64-bit signed integer.
Decimal: Represents a decimal floating-point number.
Export : This feature enables the extraction of content at the end of the process. By default, the checkbox is marked as checked, ensuring that the extracted content will be exported automatically unless you choose to uncheck it. This provides a convenient way to access your data after the extraction is complete.
When the Export option is enabled, you can customize your export settings. Available options include specifying the Export Name, enabling Tracking, allowing empty fields, selecting Format Style, choosing the Format and managing Validation Error Handling. These options are detailed below:
Export Name: This setting allows you to define the name of the column in the export schema. By specifying a clear and descriptive export name, you ensure that the data is easily identifiable and organized in the exported file, enhancing readability and facilitating better data management for users.
Tracking: This setting allows you to configure whether the command’s content will monitor changes between runs. By default, it is set to "Default," but you can choose from any of these three options: Default, Identifier, and Excluded. This flexibility helps you manage how changes are tracked during each run. This option is effective only when the Change Tracking feature is enabled in the Export settings of the command.
Default: This option enables tracking of changes, providing a detailed record of modifications.
Identifier: This setting specifies the certain captured content will be tracked for changes, allowing you to monitor only selected elements.
Excluded: This option excludes captured content from change tracking, ensuring that irrelevant data is not monitored.
Allow Empty: This setting determines how empty or missing values are handled in the captured content. This is crucial for managing data quality in various contexts.
Always: This option permits empty or missing values in the captured content, providing maximum flexibility.
Never: This setting disallows any empty or missing values, ensuring that all fields must be completed before export.
Runtime Only: This option allows empty values during runtime, while enforcing restrictions at other times, striking a balance between flexibility and data integrity.
Percentage: This setting allows a specified percentage of empty values, enabling some degree of flexibility while maintaining overall data completeness.
Validation Format style: This setting enables you to select the formatting applied during export. Options include None (no formatting), Regex (custom patterns), Date (date formatting), Numeric Value Range (formatted within a range) and JSON (structured data). Proper selection ensures clarity and usability of the exported content.
Validation Format: This option allows you to define a specific pattern to use with the selected Format Style. By setting a pattern, you ensure that the exported data is consistently formatted, making it clearer and easier to understand.
Display Format: This option allows you to define the structure or pattern for how the data should be presented in the selected style.
Timezone handling: This setting allows you to specify how time zones are managed during data export. The options include:
Assume Local Time Zone: This option assumes that the times are in the local time zone of the system.
Assume Universal Time Zone: This setting treats all times as being in Universal Time (UTC), regardless of the local time.
Adjust to Universal Time: This option converts the local time to Universal Time (UTC), ensuring consistency in time representation across different regions.
Validation error handling: This setting determines the actions to take when a data validation error occurs. You can specify how to respond to such errors. The options include:
Report Error: Increases the error count while keeping the row in the export, allowing for later review of problematic data.
Report Failure: This option simply reports the failure.
Remove Data Row: Deletes the entire row from the export data, ensuring only valid entries are included.
Remove Data Row and Report Error: Removes empty rows from the export data and increases the error count when such rows are detected, helping maintain data integrity while tracking issues.