Organizing your Data Operation
Setting up a Schedule Task
Sequentum Cloud offers an agent scheduling feature that allows you to automate the execution of agents at predefined intervals. You can schedule agents to run every minute, hour, day, week, month, year or at any custom interval based on your needs.
To schedule an agent, simply click on the agent's name to open the Agent Details page.

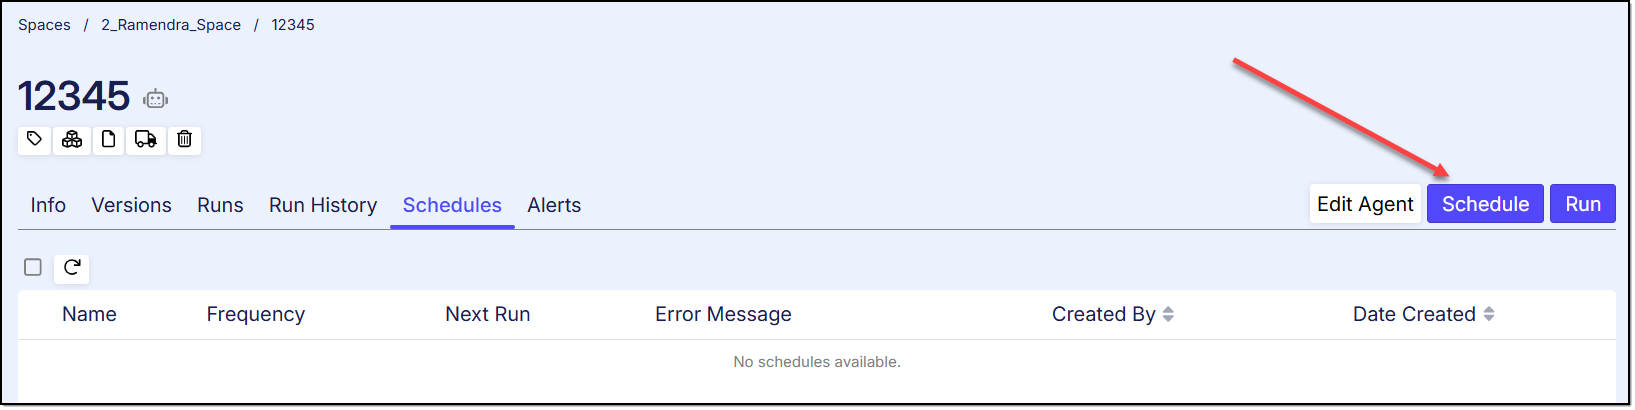
Agent details page
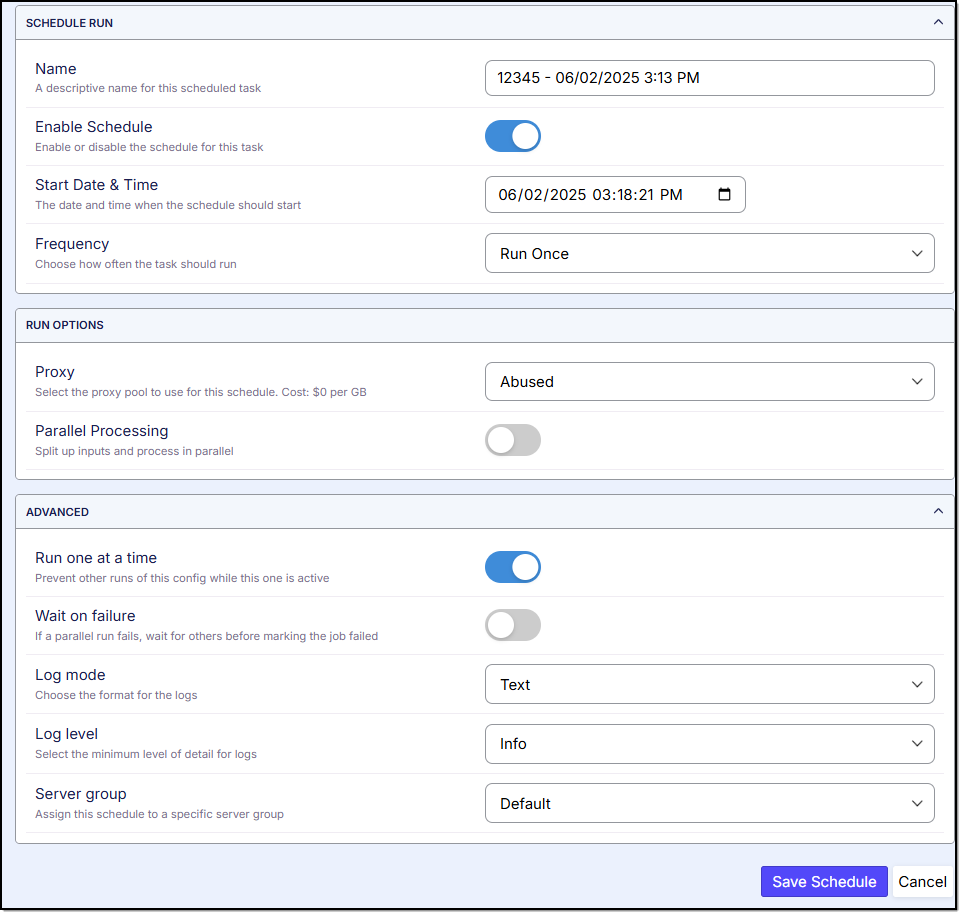
Then, click the 'Schedule' button to create a new schedule. This will open a new page, as shown below.
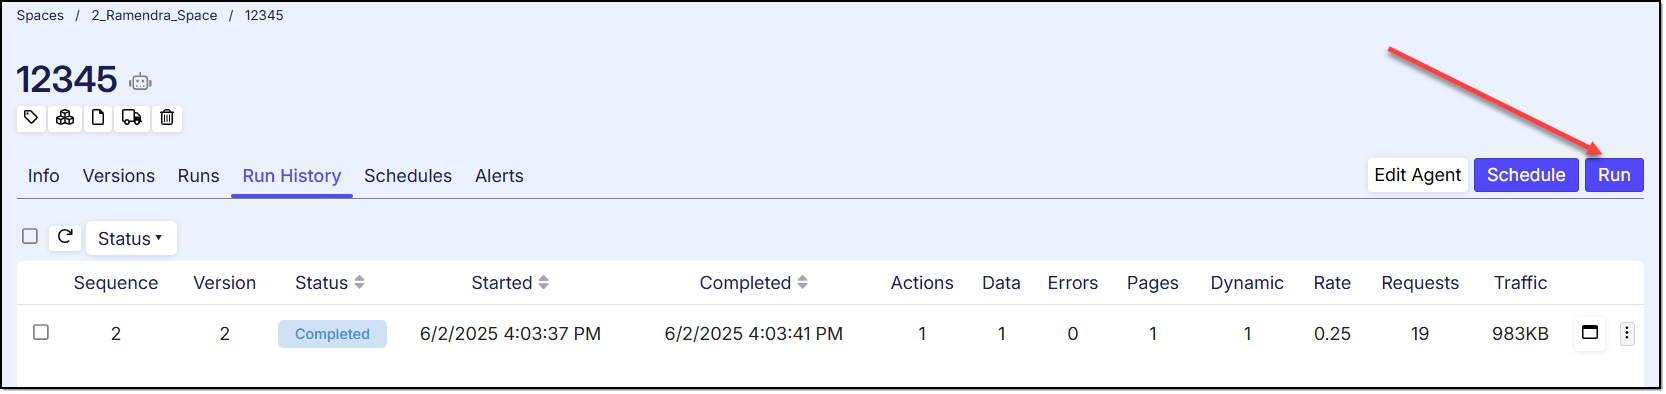
Run Now: The "Run" option allows users to execute an agent immediately, without the need to create or schedule a task. This option provides flexibility for users who need to trigger the agent on-demand. When the "Run" button is clicked, the agent is executed instantly, bypassing any pre-set schedules.
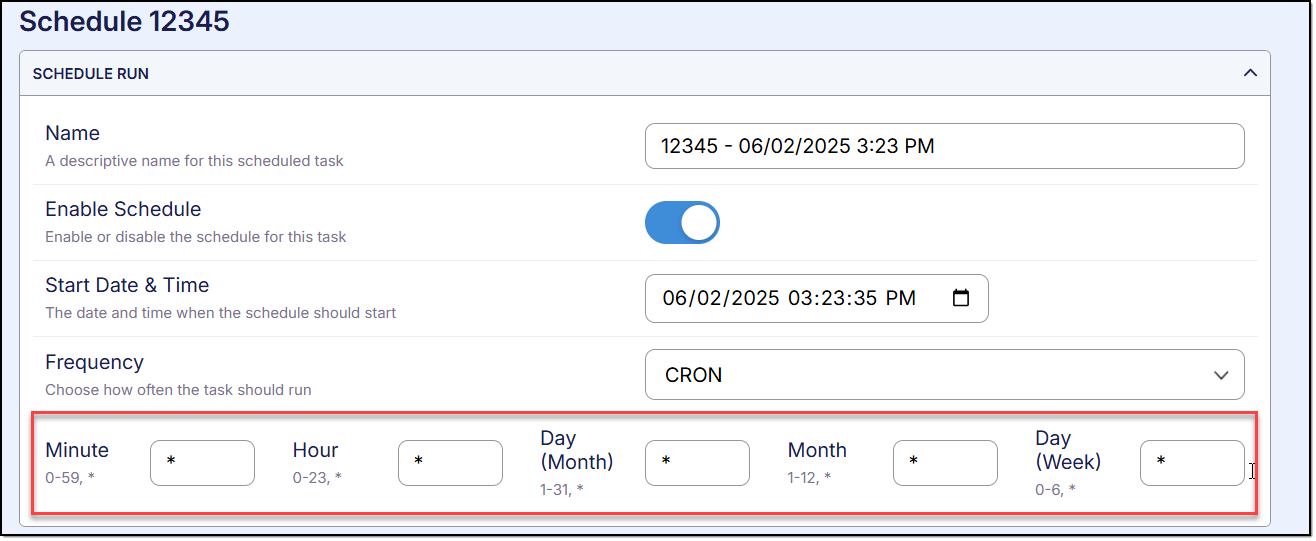
CRON schedule:
Users have the option to set up a CRON schedule. To access the CRON window, simply select 'CRON' from the 'Frequency' dropdown.
In the 'Schedule' window, users can configure the Log Mode ('Text' or 'Text and HTML'), select the Log Level (Fatal, Error, Warning, or Info), and choose the Server Group (Default or Window 11, Window 11 GPU, Kubernetes).
Parallel Processing:
Users also have the option to split inputs and execute them in parallel. This feature allows users to divide large inputs and process them concurrently for more efficient execution.
To enable this functionality, simply turn on the 'Parallel Processing' option as shown below.

Once this option is enabled, the window will expand to display three additional fields: Total Runs, Concurrency and Export.
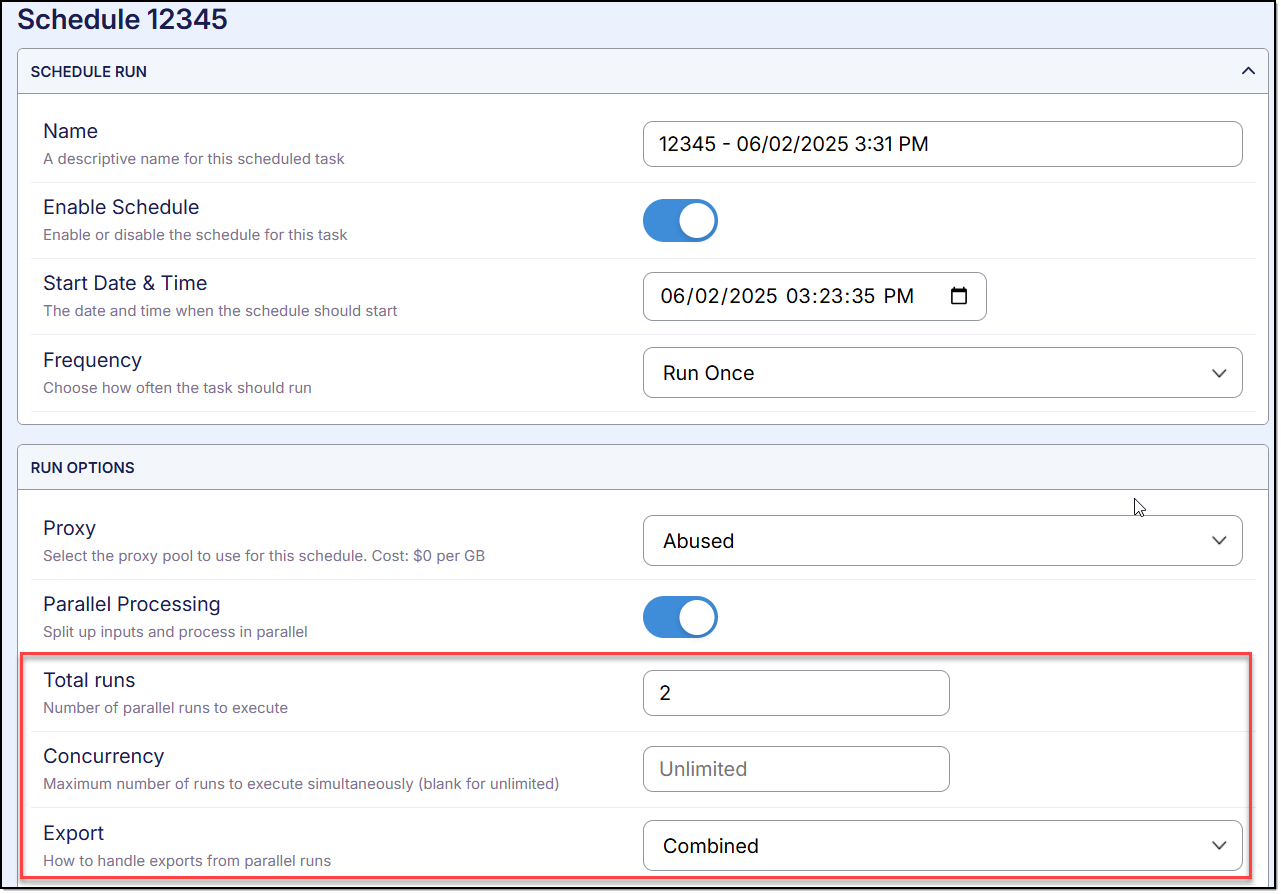
Total Runs: Specifies the total number of splits for the input data.
Concurrency: Defines the number of executions that will run simultaneously
Export: Allows users to choose whether to export the data as a combined output or separately for each session.
Run one at a time
Sequentum Cloud offers exclusive run execution, a powerful feature designed to ensure data integrity and prevent conflicts during critical data extraction processes.

When an agent is enabled with 'Run one at a time', the system ensures that only one run is executed at a time. Any subsequent run attempts are temporarily restricted until the current execution is completed.
If you attempt to initiate a new run while an exclusive run is already in progress, the system will display a clear and informative message indicating that another run is currently underway.
Parallelism and Exclusivity
Even when operating in parallel execution mode, the exclusive run maintains priority. If an exclusive run is initiated while other parallel runs are executing, the new exclusive or non-exclusive runs will not be started or initiated. The Subsequent Runs will only be started once the current exclusive run completes.
Example:
When an Exclusive run already in Progress:
Suppose any Exclusive run is already in progress whether it be a single run or parallel run. And if you try to execute another run a error message will appear.

When an Non-Exclusive run already in Progress:
Suppose any Non-Exclusive run is already in progress whether it be a single run or parallel run. And if you execute another run the run will be successfully executed and will be shown in the “Runs” Tab.

Monitoring Runs in Progress
Once the agent is in execution, navigate to the agent details page where the status will be displayed as 'Running.' To monitor the live execution, click the 'View Live Information' button, as shown below:
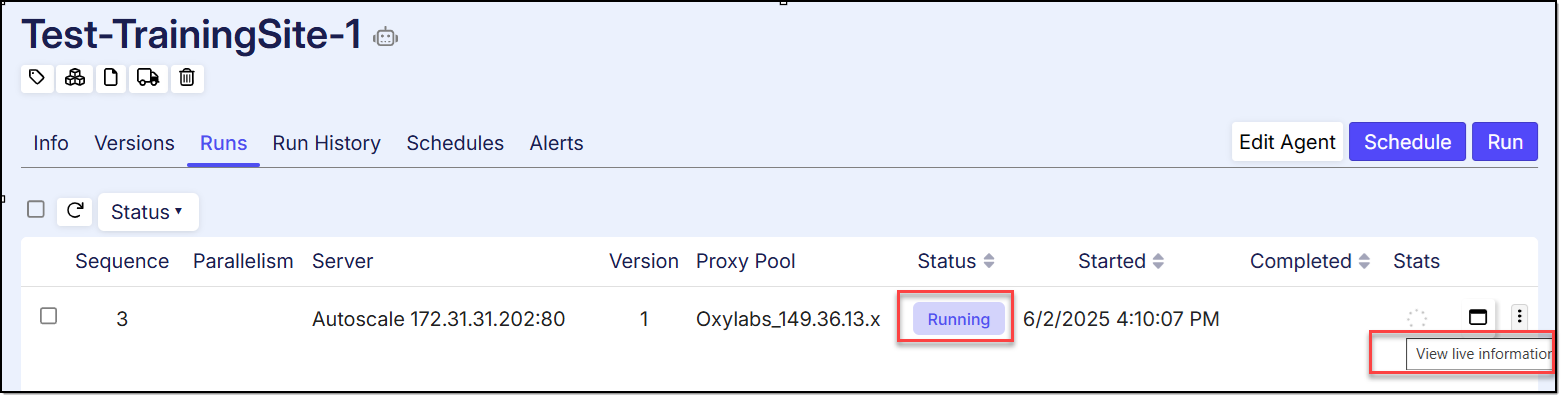
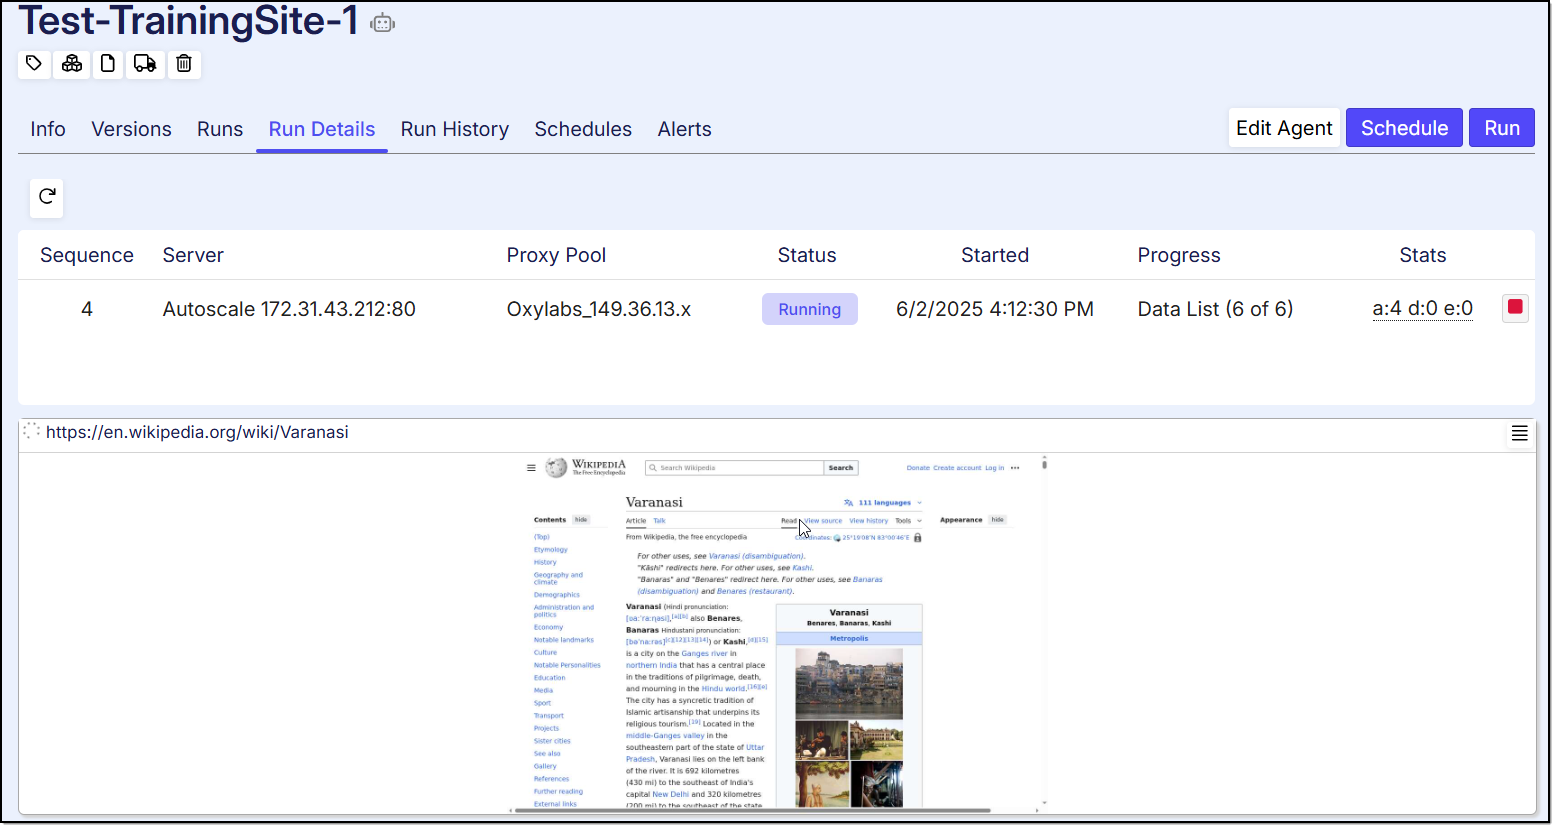
After selecting the option mentioned above, a live stream of the agent's execution will be shown, enabling users to monitor progress in real-time.
Stopping a Run
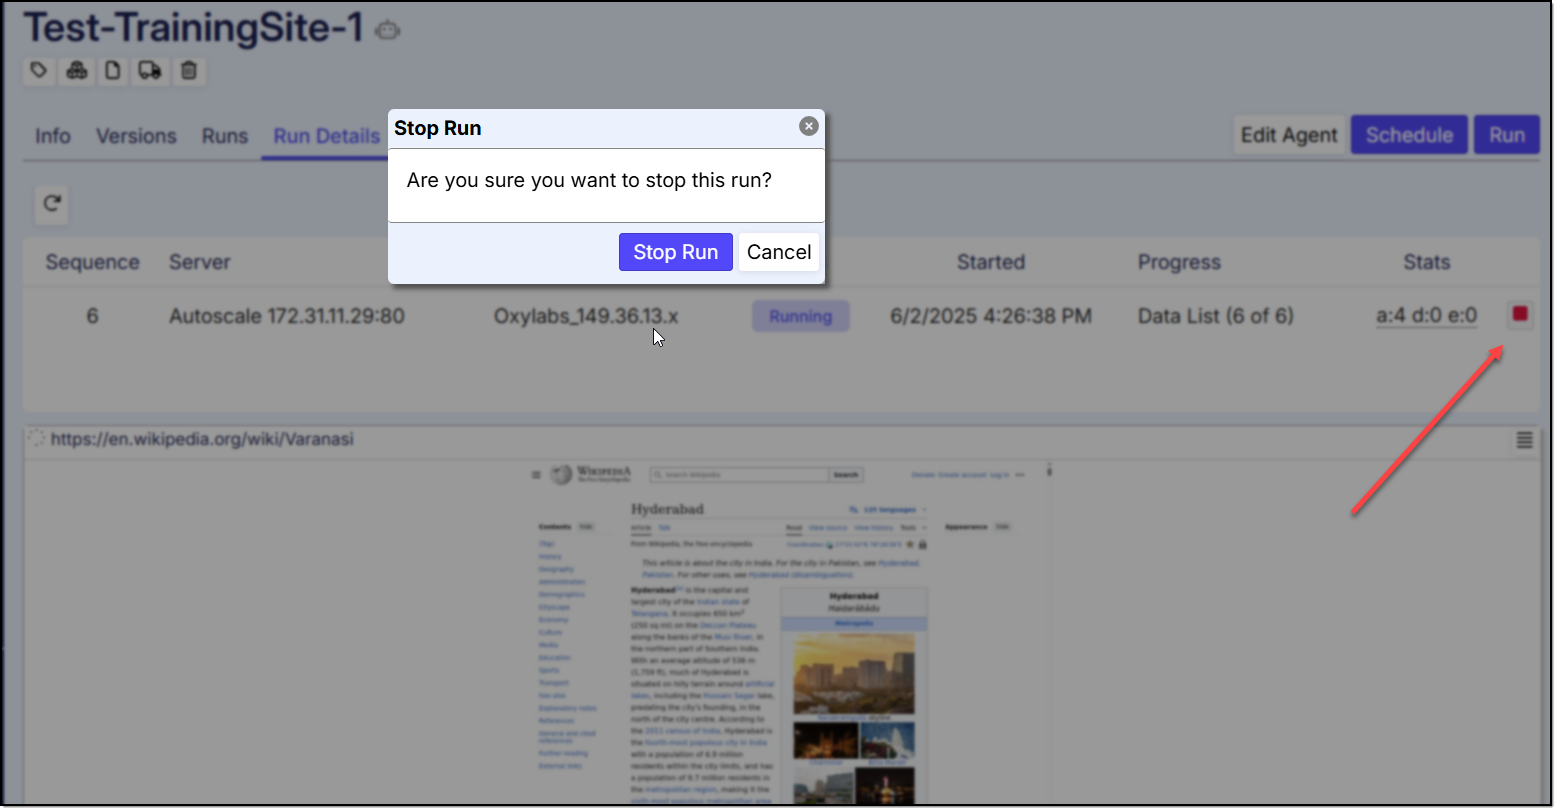
Users can stop a running execution at any time by clicking the 'Stop' button, as shown below. When this happens, the status will be updated to 'Stopped' in the 'Status' column on the Runs page.
Reviewing Run History
This option allows you to view the Run History of the agent. Run history page displays the complete run history of the agent job schedule.
You can navigate to the Run history page via the below option:

Users can view the details of a specific agent execution by clicking the 'View Run Details and Files' button. On this page, users will find the historical logs and output files tailored to their requirements.
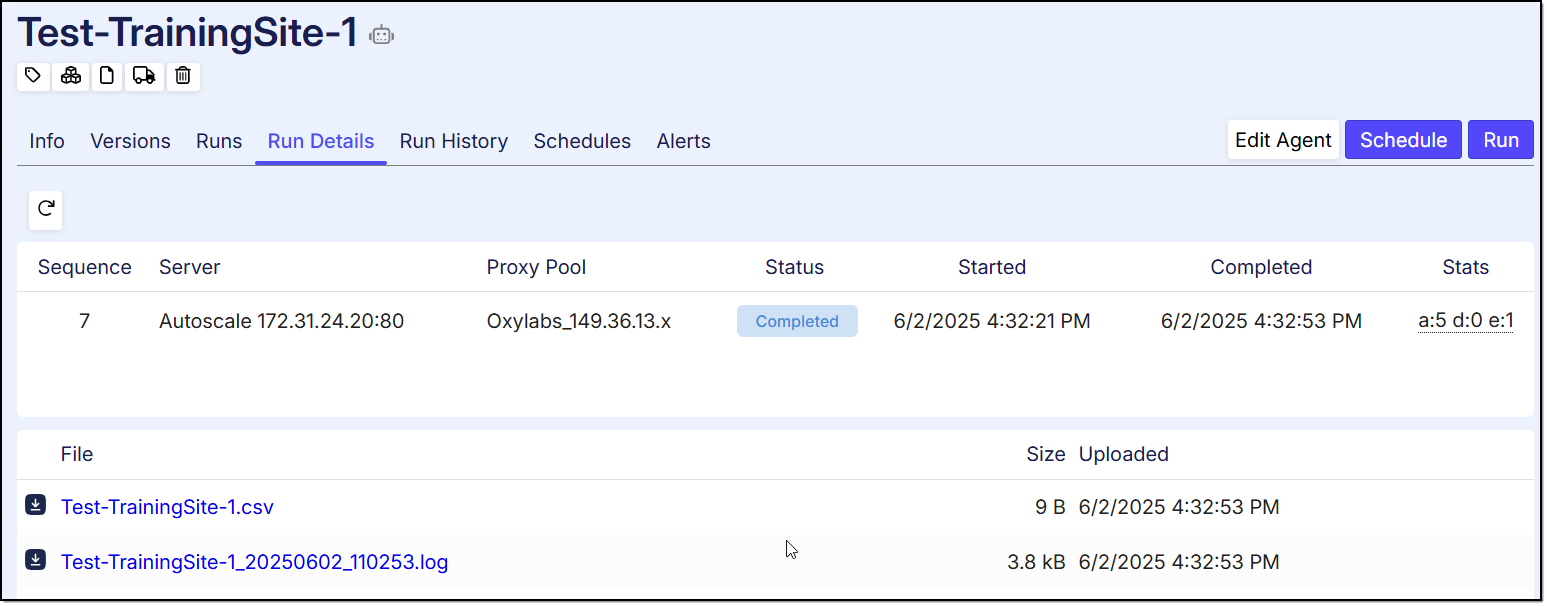
Runs:
This Page allows you to view the latest Run of the agent. Runs page displays the details of the agent.
Runs Context Menu
For each row, under the run history page, there are several context menu options that can be used to manage the agent execution, restart , continue and manage agent run status.
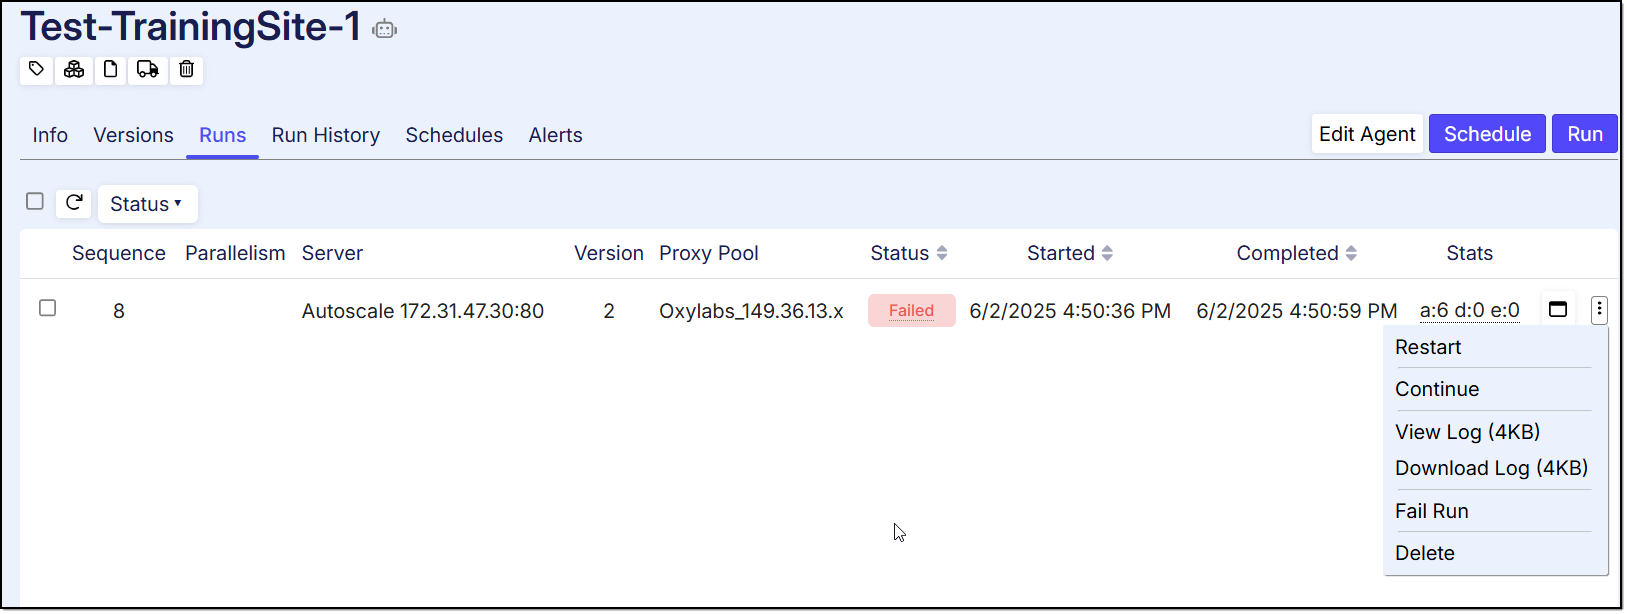
Restart: Click on this option if you want to restart your agent.
Continue: Click on this option if you want to Continue your run
Retry Errors: Click on this option if you want to retry your agent to only retry the failures/errors and don't want to start the restart again.
Retry Errors & Continue: This is a useful option in case your agent encountered any failures and you want to only retry the failures/errors and don't want to start the restart again. Click on this option and the agent will retry the errors and will continue the agent execution for the failures.
Note ->This Feature is Available by Selecting Keep runtime data for latest run as Always. For more https://cloudsupport.sequentum.com/scm/agent-configuration-overviewFail Run: Use this option to set the run as failed which allows the users to stop the agent execution.
Delete: Deletes the particular run.