S3 Command
Sequentum Cloud has the ability to export data directly to Amazon S3, providing seamless integration with AWS for efficient data storage and management. Sequentum Cloud leverages AWS’s Assume Role functionality mechanism to gain temporary credentials, limited access to your specified S3 bucket for data delivery. This ensures enhanced security since roles grants temporary access, reducing long-term credential risk, and you control exactly how Sequentum Cloud interacts with the S3 bucket by adjusting your external IAM role’s permissions.
To start configuration from the main Sequentum Cloud dashboard, click on the “Organization” button on the bottom left of the screen. Next, in the available tabs that appears, click on the “Destinations” tab.
Now click on “New Destination” to add a S3 export. For this example, we will be exporting to S3 buckets.
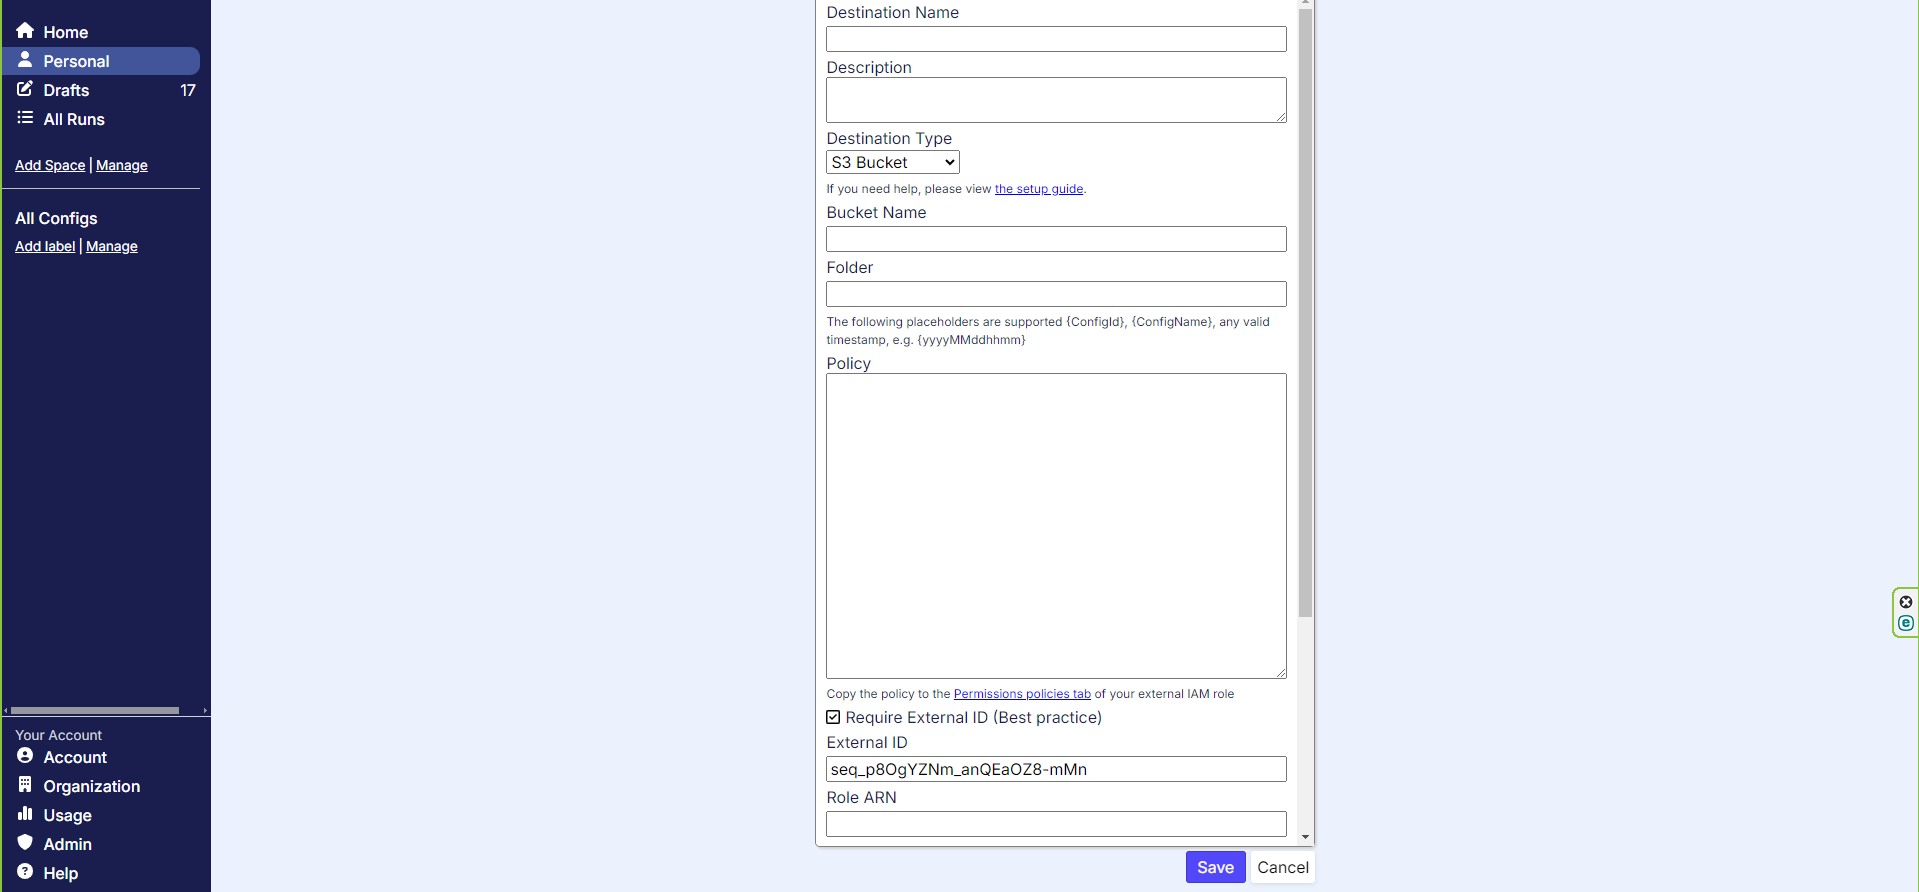
Destination Configuration Screen
Enter in a destination name and description for the new destination. For destination type, keep as the default S3 bucket. Now enter in the bucket name and folder path in which you want to deliver the data. A policy will be generated for you which looks something like the screenshot below.
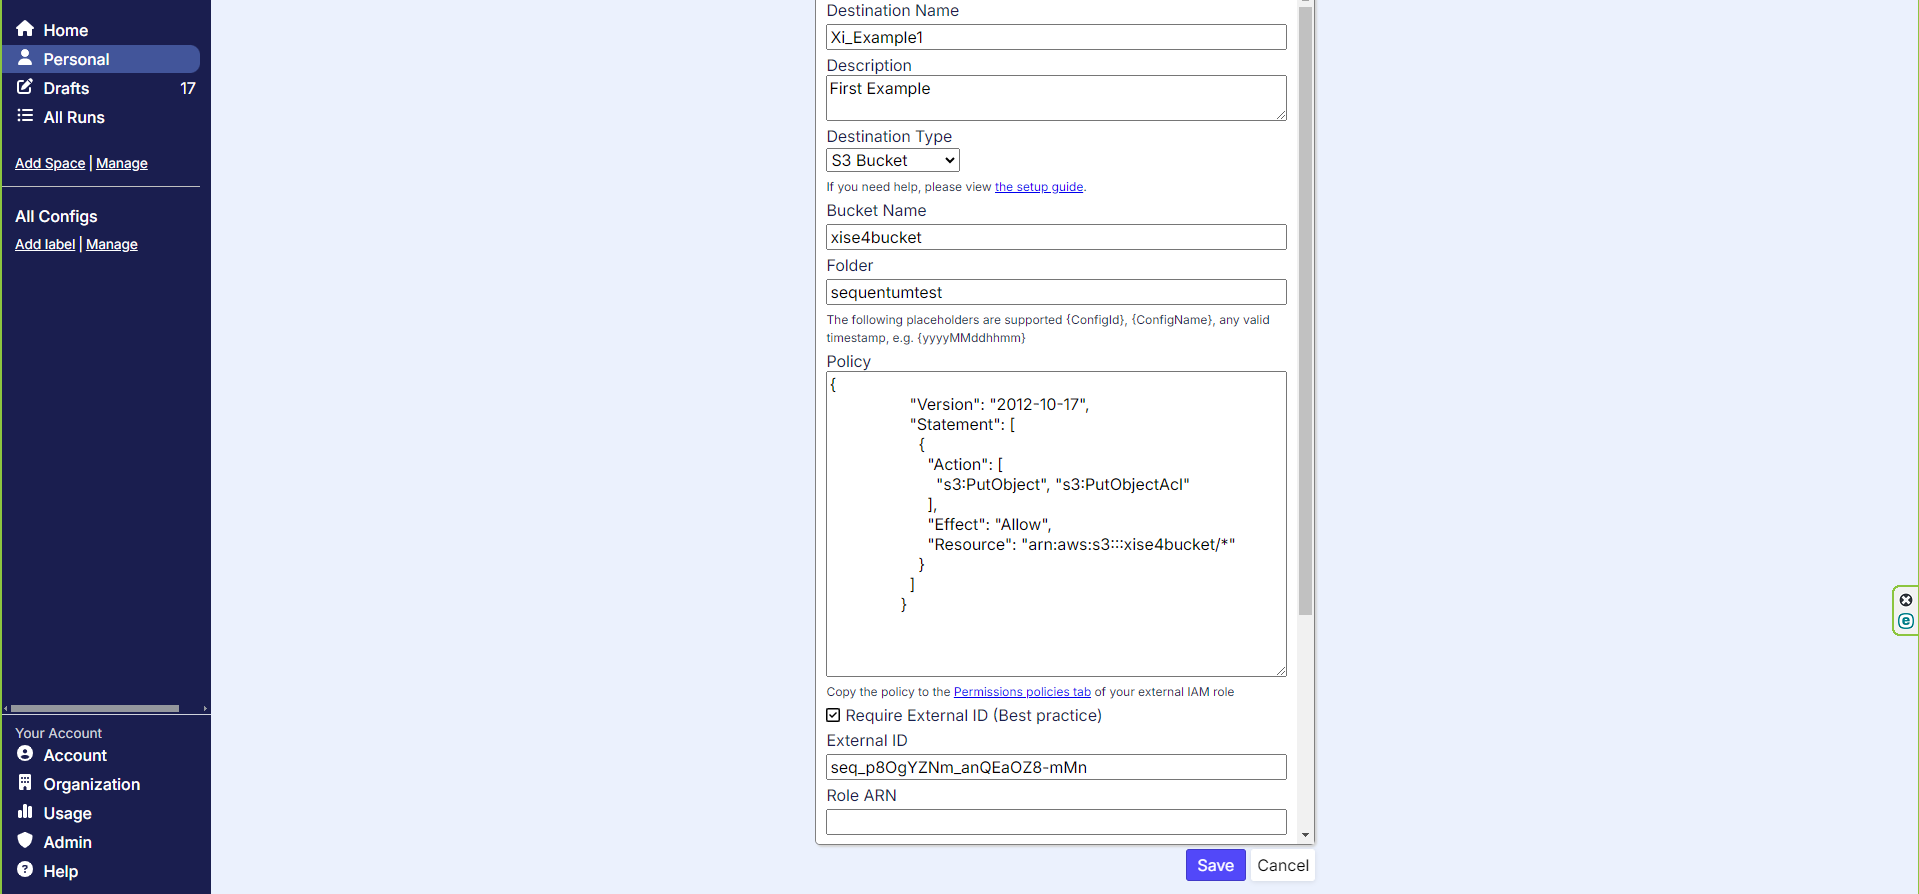
Configuring our bucket name and folder
Scroll down on the page and let’s fill out the Role ARN
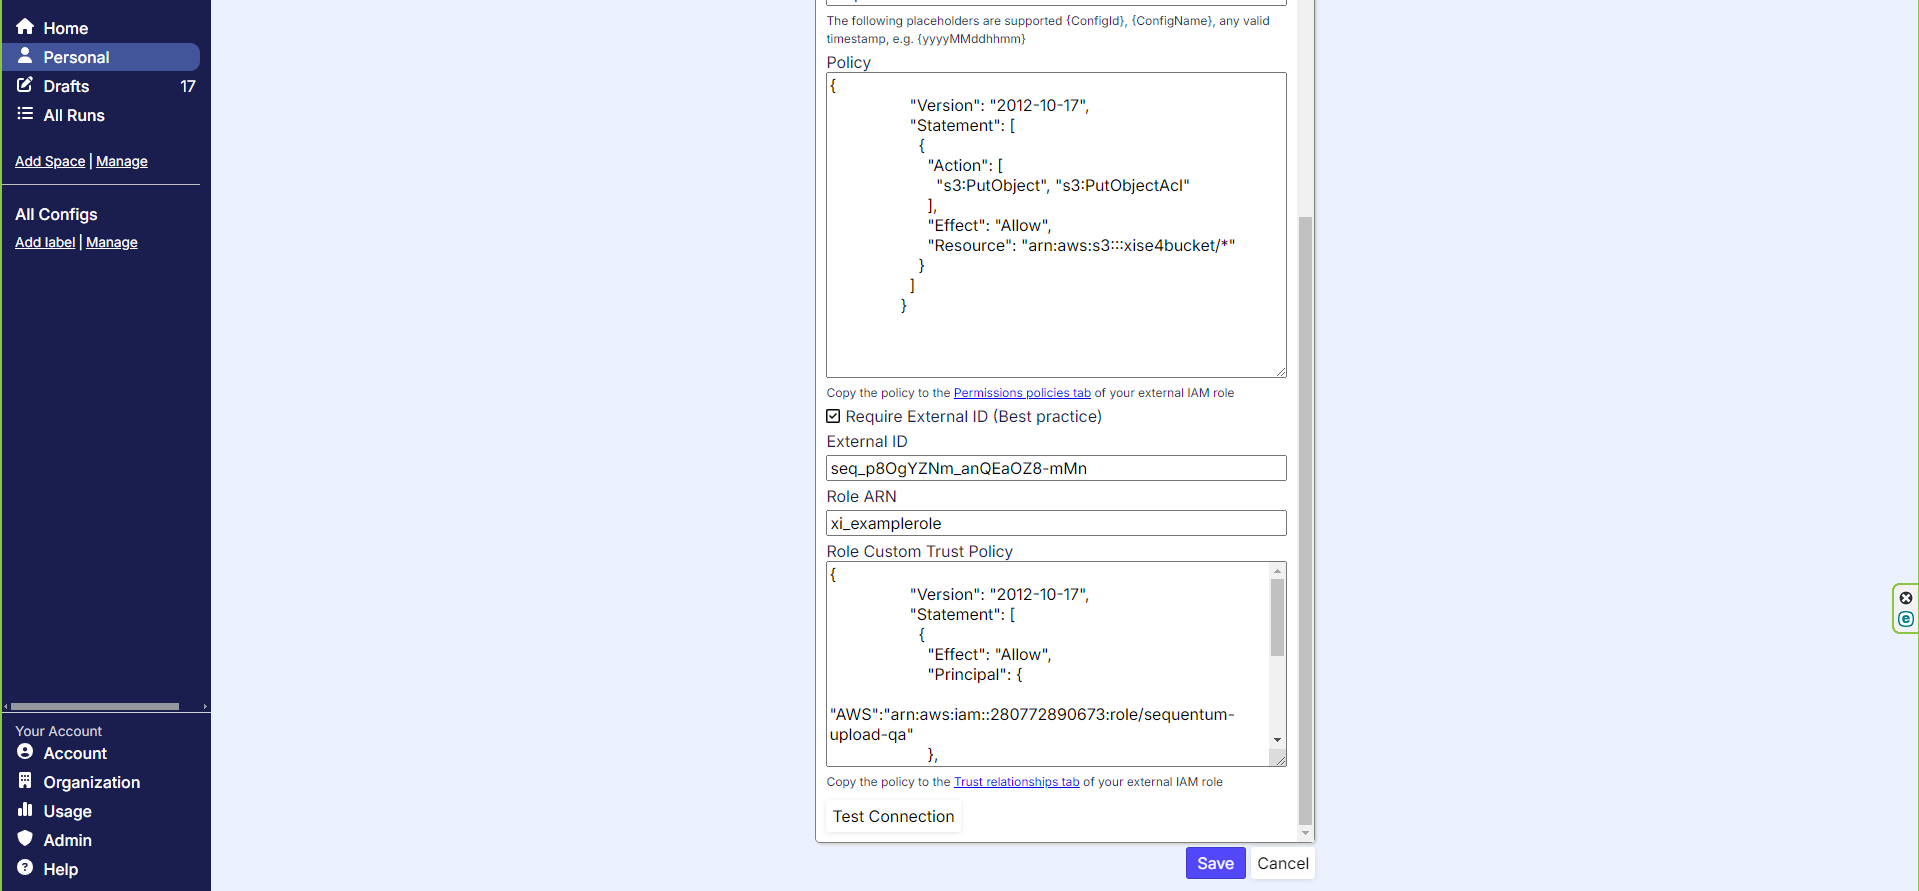
Configuring our ARN
*NOTE* the Role ARN needs to be the full ARN. Example ARN:
arn:aws:iam::666666666666:role/examplerole
After all of this has been filled out, we will need to apply these policies on our S3 bucket if it hasn’t already been done previously.
First, let’s copy the everything under “Policy” to our external IAM role. Head over to your specified role and add in in-line permission and paste in the permission and press next. Now name the permission and press save. This permission on this role allows to user to upload file to the specified bucket. If you want to allow more permissions, simply apply more permission under “Action”.
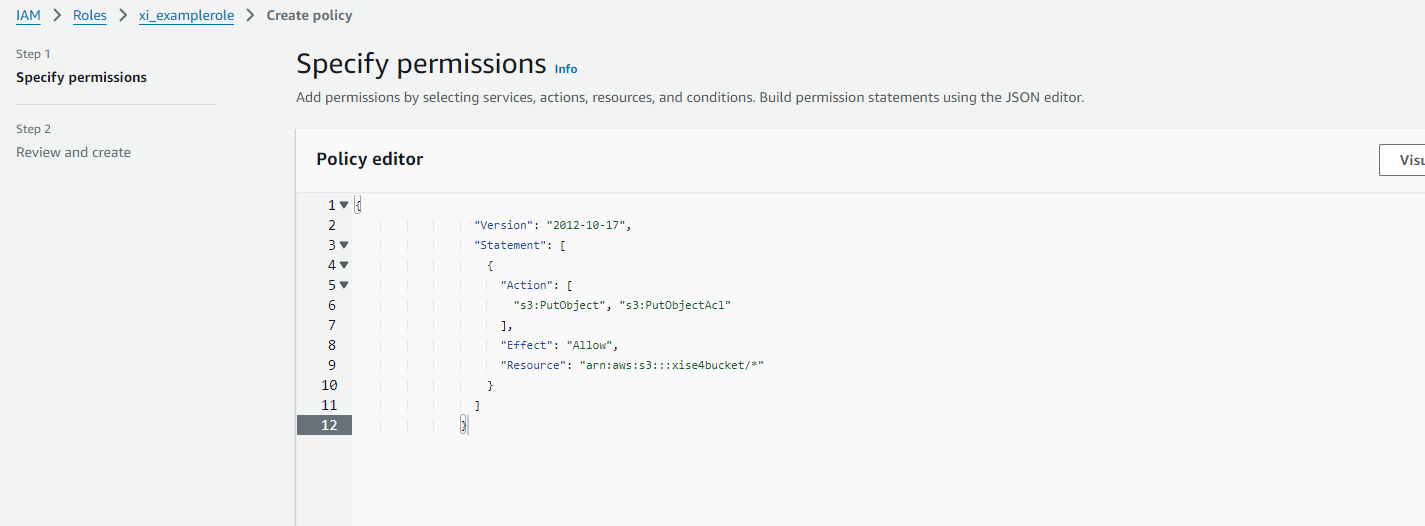
Adding permission to upload to bucket
After the policy has been created with the permission above, click on the “Trust relationships” tab and click on “Edit trust policy” and paste in our new trust policy and press update policy. This allows the “sequentum-upload-qa“ user to assume the external IAM role to perform the upload.
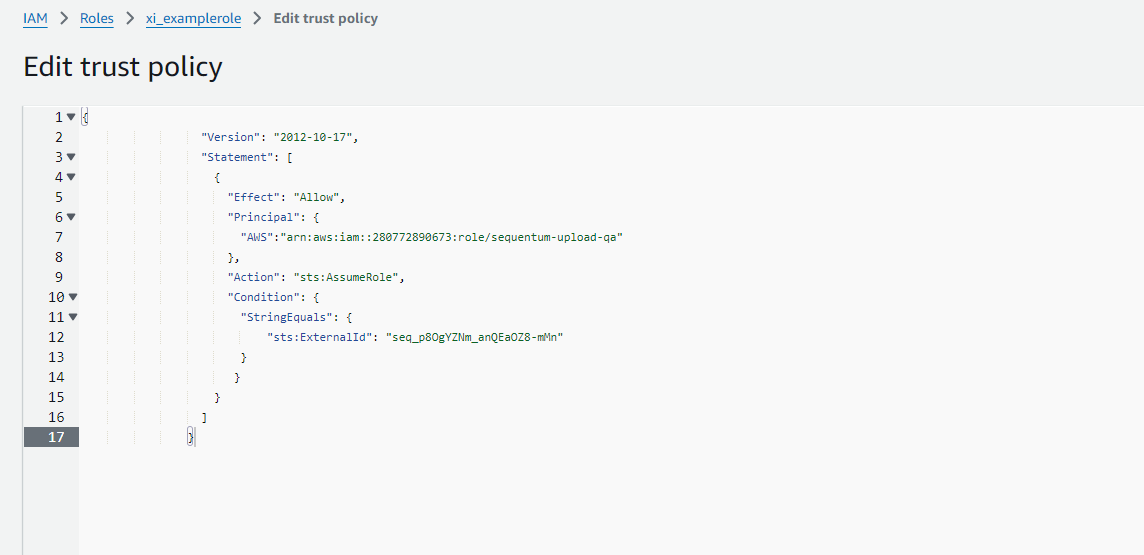
Adding a policy to allow sequentum-upload-qa user to assume the external iam role
After all the configurations have been saved, head back over to the Sequentum Cloud Destination page and press “Test Connection” If everything was configured correctly, a test file would have been uploaded to your S3 bucket.
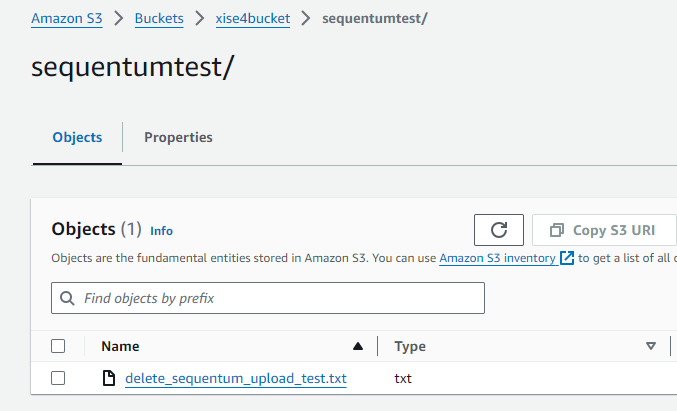
Sample test uploaded file
Now, to use this destination in any of your agents, create a new S3 export and under destination name, select the new destination that we just created and save changes. Now when the agent finishes running and is generating the csv file, it will also drop the file off in your S3 bucket.
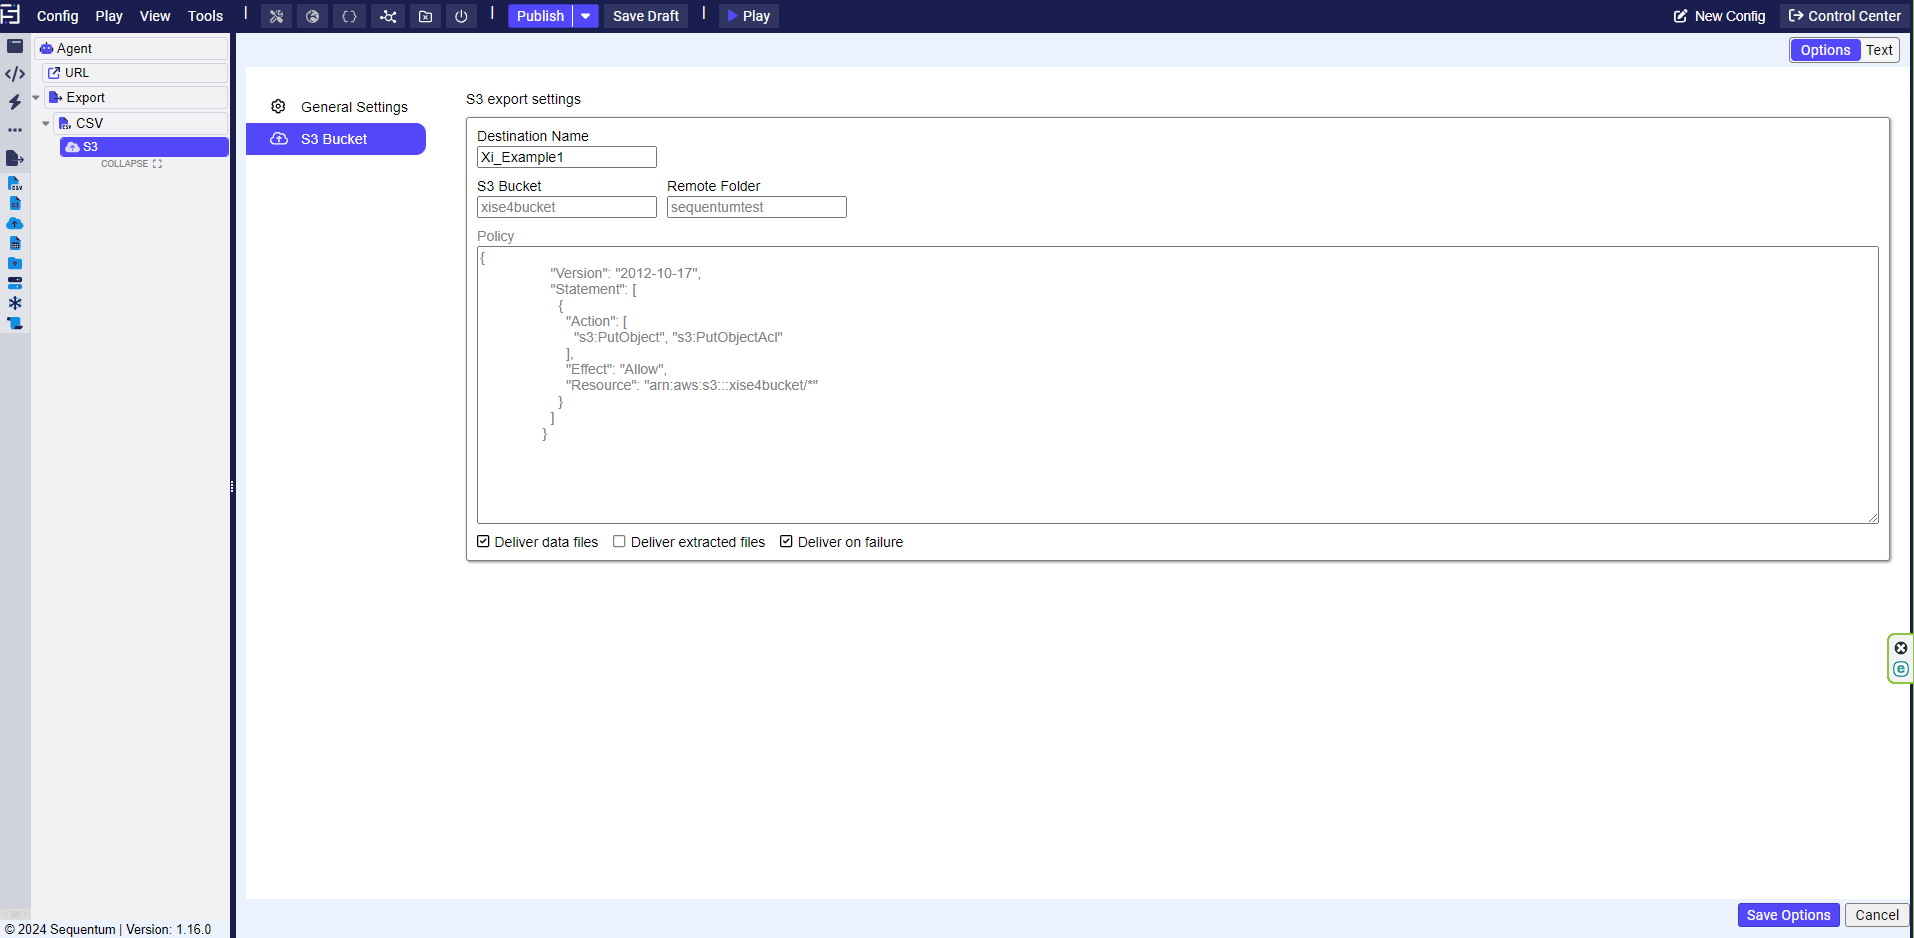
Adding the destination to our agent
Common Troubleshooting Errors
If you are encountering any issues during this setup process, here are some steps to help you debug the issue.
Add a Bucket Policy to Allow Access
You need to ensure that there is a bucket policy that allows your IAM role to put objects into the bucket:
Example of a bucket policy:
{
  "Version": "2012-10-17",
  "Statement": [
    {
      "Effect": "Allow",
      "Principal": {
        "AWS": "arn:aws:iam::666666666666:role/your-iam-role"
      },
      "Action": [
        "s3:PutObject",
        "s3:PutObjectAcl"
      ],
      "Resource": "arn:aws:s3:::examplebucket/*"
    }
  ]
}
This policy allows the iam role: arn:aws:iam::666666666666:role/your-iam-role to upload objects and set access control for said objects for the specified bucket: arn:aws:s3:::examplebucket
Verify IAM Role Permissions
We need to ensure that the IAM Role actually has permission to interact with the specific S3 bucket. Make sure that the IAM Role has permissions similar to the following inline policy.
Example of a IAM Role Permission
{
  "Version": "2012-10-17",
  "Statement": [
    {
      "Effect": "Allow",
      "Action": [
        "s3:PutObject",
        "s3:PutObjectAcl"
      ],
      "Resource": "arn:aws:s3:::examplebucket/*"
    }
  ]
}
Verify Trust Relationships Policy
We also need to ensure that there is a trust policy to allow the sequentum role arn:aws:iam::280772890673:role/sequentum-upload-qa and/or arn:aws:iam::280772890673:role/sequentum-upload-prod to assume the external IAM role to upload files.
Example of Trust Relationships Policies
{
  "Version": "2012-10-17",
  "Statement": [
    {
      "Effect": "Allow",
      "Principal": {
        "AWS": "arn:aws:iam::280772890673:role/sequentum-upload-qa"
      },
      "Action": "sts:AssumeRole",
      "Condition": {
        "StringEquals": {
          "sts:ExternalId": "seq_p8OgYZNm_anQEaOZ8-mMn"
        }
      }
    }
  ]
}
There might be a different Sequentum role depending on your environment. To ensure that you’re using the proper role, you can add both also add both arn:aws:iam::280772890673:role/sequentum-upload-qa and arn:aws:iam::280772890673:role/sequentum-upload-prod
Confirm that the External ID Usage Matches
If you are copying directly from the Sequentum Cloud Destination Dashboard, then there shouldn’t be an issue, but you can double check to make sure that the external id matches.
In the following example, there is confirmation that the external ID matches.
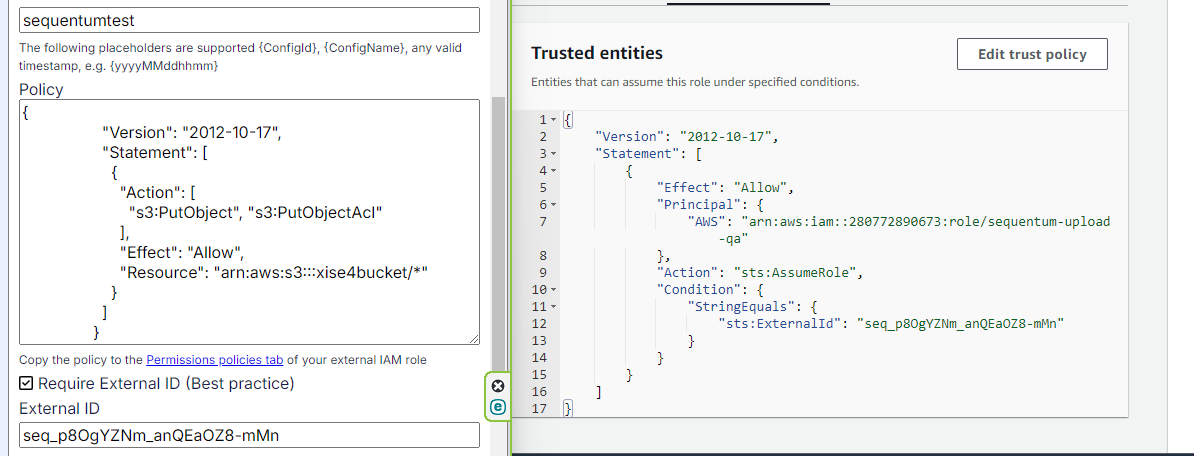
Confirm the Role ARN
Also confirm that the role ARN that is being used is the full arn which includes the arn:aws:iam:: part.
Example of a valid role ARN

If you are still encountering any issues with exporting to your S3 bucket after following all of these steps. Please reach out to support@sequentum.com for additional help.
