Snowflake Command
Snowflake is provided as one of the export destinations within the Export Commands section. It allows users to export data directly to their Snowflake environment, facilitating seamless data transfers for analytics or storage purposes. To configure this option, users need to set up their Snowflake account details, including necessary credentials and destination schema, ensuring that the export process runs smoothly and integrates effectively with their existing Snowflake infrastructure.
The Snowflake command is located under the Export option in the command palette (refer the below snapshot)
In order to make the optimum use of the Snowflake command, we can configure the options as shown in the below screenshot, as per the user requirement.
Command Configuration
The configuration screen for the Snowflake command has two tabs viz. Options and Text. Use the ‘Options’ tab to set the command name and other command properties. Use the ‘Text’ tab to navigate to the text of the agent where the command part is present.
Command Properties
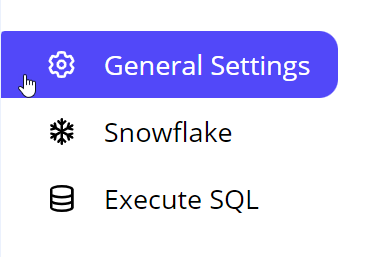
On the Options tab of the command, we have four options:
General Settings
Snowflake
Execute SQL

General Settings → General Command Settings
The ‘General command settings’ section is designed for user customization to give the command a desired name, comment to describe in brief about the usability or requirement for the command and the disabled option to not execute this command at all.

Command name: This property specifies the name of the command.
Comments: Provides a field for entering metadata or a brief description regarding the command. These annotations are used internally to provide context for developers or team members. Comments are not part of the exported data and are only used for documentation purposes within the configuration.
Disabled: This checkbox allows the user to disable the command. When checked, the command is ignored during execution. By default, it is unchecked.
Snowflake → Snowflake export settings
Snowflake configuration: In Snowflake configuration, the settings are set to custom. This allows you to update configurations such as setting up your account, creating users and roles, configuring warehouses and managing databases and schemas. Once the configuration is complete, it becomes available in the dropdown menu.
Account -> The account identifier is unique to your Snowflake environment and usually has the below format:
Example ->snowflake://username:password@account.region.snowflakecomputing.com
Authorization Type -> The authorization types focusing specifically on Basic Authentication and Private Key Authentication and Private Key with Passphrase:
Basic -> Basic Authentication is a straightforward method and default method where the client sends credentials (username and password) encoded in Base64 as part of the HTTP request header.
Privatekey : This method uses asymmetric cryptography, where a pair of keys (public and private) are generated. The private key remains confidential with the user, while the public key is stored in Snowflake. Users provide credentials in json format.
Private Key with Passphrase: This method enhances key pair authentication by encrypting the private key with a passphrase.
The private key remains confidential and is secured with a passphrase known only to the user.
The corresponding public key is stored in Snowflake.
During authentication, users provide a JSON object that includes the encrypted private key and the passphrase to decrypt it.
This approach adds an extra layer of security by requiring both the private key and its passphrase.
Private key (encrypted when saved)-> This method uses asymmetric cryptography, where a pair of keys (public and private) are generated. The private key remains confidential with the user, while the public key is stored in Snowflake. Users provide credentials in json format.
Username-> The username is your Snowflake user account identifier.
Role->Roles define what permissions a user has within the Snowflake account.
Database->A database in Snowflake is a container for schemas and data.
Schema-> A schema is a way to logically group tables, views and other database objects.like(Public)
Snowflake named stage->A named stage is a Snowflake object that points to a cloud storage location.
Deliver Data Files: The default value is set to True which indicates the delivery of the data files which is your exported files like CSV or Parquet.
Deliver Extracted Files: Default value is set to False. To deliver the downloaded files like HTML, image, pdf file, etc. we need to set this property as True to deliver these files to the target destination.
Deliver on Failure: The Default value is set to False. To deliver the file in case of any failure. This will make sure that your file is exported to the destination no matter the failure.
Test connection -> Fill in the required details for creating the Snowflake named connection. Specify the Account, Username, Password and other details . Additionally, click on the Test Connection button to check if your connection is established successfully.
Execute SQL
This command is used to run SQL statements or batches of commands against a database to perform operations such as data creation, updates or queries. It allows interaction with databases through structured SQL commands, enabling data management and manipulation as per user requirements.
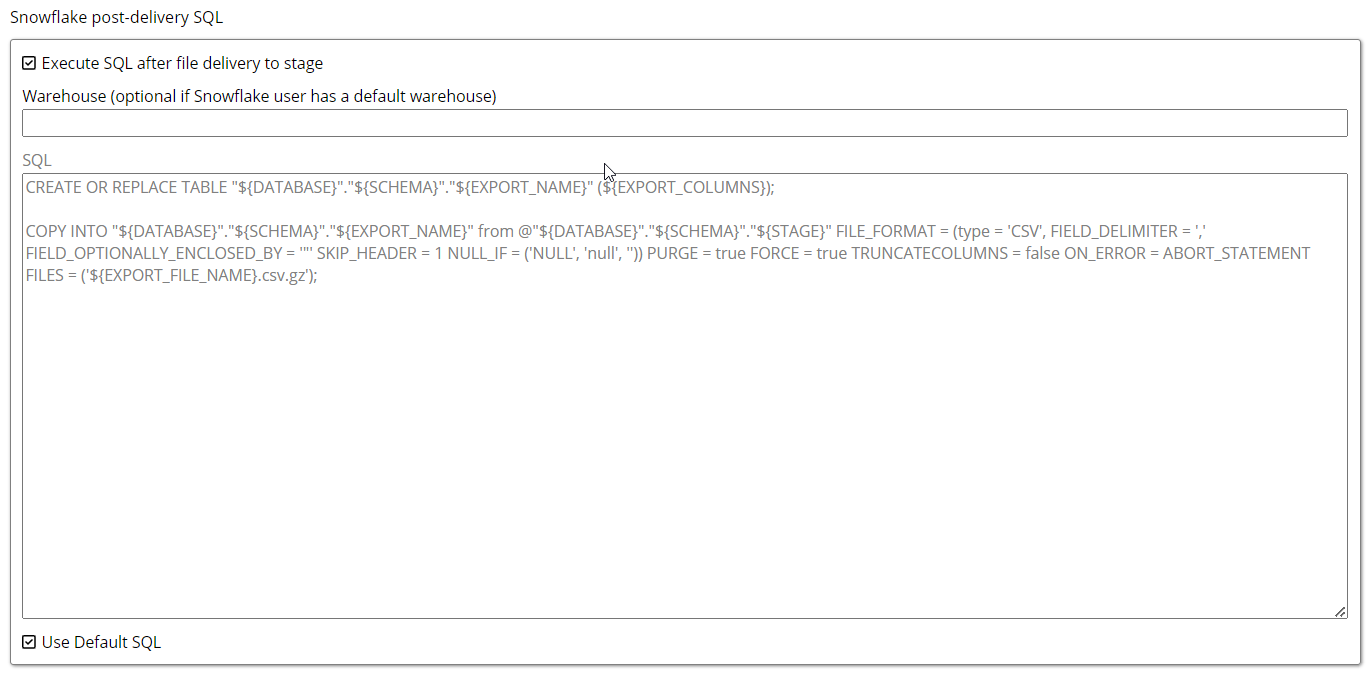
Snowflake post-delivery SQL: After exporting data to Snowflake, the data is first uploaded to a designated staging area rather than directly into a Snowflake table. Users then need to copy the data from the stage into the desired table using SQL commands. This staged approach ensures data is processed and handled properly before final insertion into the database.
Execute SQL after file delivery to stage: This feature enables users to write and update queries on the data in the staging area. It provides the capability to modify and manage the data directly within the stage, facilitating more dynamic data handling and preparation before it is loaded into the main database.
Warehouse: In Snowflake, warehouses play a critical role in executing SQL queries and managing data processing tasks. They act as compute resources that power query execution. This field is optional if a default warehouse is already configured for the user, but it can be specified if additional or custom warehouses are required.
Use Default SQL: By selecting this option, the default SQL command will be executed automatically. When this property is unchecked, users can write their custom SQL queries under the SQL Command field, offering greater flexibility in defining specific actions or processes for data handling
Default code
CODECOPY INTO "${DATABASE}"."${SCHEMA}"."${EXPORT_NAME}" FROM @"${DATABASE}"."${SCHEMA}"."${STAGE}" FILE_FORMAT = (type = 'CSV', FIELD_DELIMITER = ',', FIELD_OPTIONALLY_ENCLOSED_BY = '"', SKIP_HEADER = 1, NULL_IF = ('NULL', 'null', '') ) PURGE = true FORCE = true TRUNCATECOLUMNS = false ON_ERROR = ABORT_STATEMENT FILES = ('${EXPORT_FILE_NAME}.csv.gz'); This SQL snippet creates a table and then loads data from a specified CSV file located in a staging area, following certain formatting rules. The process includes handling errors, managing how data is treated and cleaning up the source files afterward.
This SQL snippet creates a table and then loads data from a specified CSV file located in a staging area, following certain formatting rules. The process includes handling errors, managing how data is treated and cleaning up the source files afterward.

CREATE OR REPLACE TABLE: This command creates a new table or replaces an existing one with the same name.
"${DATABASE}"."${SCHEMA}"."${EXPORT_NAME}": These placeholders represent the database, schema and name of the table you want to create.
(${EXPORT_COLUMNS}): This part specifies the columns of the table, where ${EXPORT_COLUMNS} would be replaced with a list of column definitions (like column names and data types).
COPY INTO: This command is used to load data from files into the specified table.
FROM @"${DATABASE}"."${SCHEMA}"."${STAGE}": This indicates the source of the data, which is stored in a stage (temporary storage area) within the specified database and schema.
type = 'CSV': The file is in CSV format.
FIELD_DELIMITER = ',': Columns in the CSV are separated by commas.
FIELD_OPTIONALLY_ENCLOSED_BY = '"': Fields can be enclosed in double quotes.
SKIP_HEADER = 1: The first row (header) of the CSV file will be ignored.
NULL_IF = ('NULL', 'null', ''): The values 'NULL', 'null' or empty strings will be treated as NULL in the database.
PURGE = true: This option removes the files from the stage after they are loaded.
FORCE = true: Forces the command to execute even if certain conditions are not met.
TRUNCATECOLUMNS = false: Prevents truncation of data if the data exceeds the column size.
ON_ERROR = ABORT_STATEMENT: If an error occurs during the load, the entire statement will abort.
FILES = ('${EXPORT_FILE_NAME}.csv.gz'): Specifies the exact file(s) to load. The filename is expected to be compressed as a .gz file.
