URL Command Overview
The URL Command enables you to open a web page in a browser by specifying a single URL, a list of URLs or by retrieving URLs from a data source such as agent parameters, commands or a data list (like CSV , Excel files or database etc.). The URL Command is located under the Browser icon in the command palette (refer below snapshot)
For instance, the simplest example of the URL command is illustrated in the screenshot below, where you can directly use a URL, i.e. https://training.sequentum.com/
In order to make the optimum use of the ‘URL’ command, we can configure the options as shown in the below screenshot, as per the user requirement.
Command Configuration
The configuration screen for the URL command has three tabs viz. Browser, Options, and Text. Use the Browser tab to select command XPath and apply selection transformations. Use the ‘Options’ tab to set the command name and other command properties. Use the Text tab to navigate to the text of the agent where the command part is present.
Command Properties
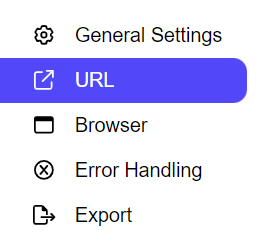
On the Options tab of the command, we have five options:
General Settings
URL
Browser
Error Handling
Export

General Settings → General Command Settings
The ‘General command settings’ section is designed for user customization to give the command a desired name, comment to describe in brief about the usability or requirement for the command and the disabled option to not execute this command at all.

Command name: This property specifies the name of the command.
Comments: Provides a field for entering metadata or a brief description regarding the command. These annotations are used internally to provide context for developers or team members. Comments are not part of the exported data and are only used for documentation purposes within the configuration.
Disabled: This checkbox allows the user to disable the command. When checked, the command is ignored during execution. By default, it is unchecked.
URL → URL input
URL: This section is used to load a web page into the browser tab. It includes a dropdown menu feature that allows users to input data from various sources, such as CSV files, databases, data lists, commands, or scripting.

Ø Data list: This menu feature is used to load a CSV file or any input file containing URLs. Users can upload an input file into the data list and then utilize that data list in the input URL section. This functionality allows users to load a list of URLs efficiently.
Ø Command: This option enables users to select input from a previous command in the agent. If a command earlier in the agent’s workflow generates content, this content can be used as the input for the form.
Ø Agent Parameter: This is used to load url from the input parameter
Ø Action Result: This option is useful when handling AJAX responses or content fetched from a parent URL or link command. The agent can parse this dynamic content and inject it into the form field. It is particularly beneficial when dealing with web pages that load content dynamically through background AJAX calls, and the input content needs to be extracted and reused.
Ø Static Value : This is used to load the static url or fixed url.
Ø Script: The script option allows users to use scripting methods to dynamically determine and input the content. Based on conditions or logic, the script can populate the input fields, making this a flexible option for complex data insertion scenarios such as C#, Python, JavaScript, or Regular Expressions.
Example: Here's an example of how to make API requests in C#, JavaScript, Python, as well as how to make a properly formatted CURL request to retrieve the restaurant URL of the Hooters website.
C# code →
public string GetData(RunContext context)
{
    string url = "https://order.hooters.com/api/vendors/search/" + context.DataRow.GetString("city");
    url += " -H \"Accept: application/json, */*\" " +
           "-H \"Accept-Language: en-US,en;q=0.9\" " +
           "-H \"X-Olo-App-Platform: web\" " +
           "-H \"X-Olo-Country: us\" " +
           "-H \"X-Olo-Request: 1\" " +
           "-H \"X-Olo-Viewport: Tablet\" " +
           "-H \"X-Requested-With: XMLHttpRequest\" " +
           "-H \"__RequestVerificationToken: \" " +
           "-H \"sec-ch-ua: \\\"Chromium\\\";v=\\\"105\\\"\" " +
           "-H \"sec-ch-ua-mobile: ?0\" " +
           "-H \"sec-ch-ua-platform: \\\"Windows\\\"\" " +
           "-H \"Referer: https://order.hooters.com/locations/" + context.DataRow.GetString("city") + "\"";
    return url;

}
Python code →
from se_scripting_utils import *
def get_data(context: RunContext):
    city = context.data_row.get_string("city")
    url = f"https://order.hooters.com/api/vendors/search/{city}"
    curl_command = (
        f"curl -X GET \"{url}\" "
        "-H \"Accept: application/json, */*\" "
        "-H \"Accept-Language: en-US,en;q=0.9\" "
        "-H \"X-Olo-App-Platform: web\" "
        "-H \"X-Olo-Country: us\" "
        "-H \"X-Olo-Request: 1\" "
        "-H \"X-Olo-Viewport: Tablet\" "
        "-H \"X-Requested-With: XMLHttpRequest\" "
        "-H \"__RequestVerificationToken: \" "
        "-H \"sec-ch-ua: \\\"Chromium\\\";v=\\\"105\\\"\" "
        "-H \"sec-ch-ua-mobile: ?0\" "
        "-H \"sec-ch-ua-platform: \\\"Windows\\\"\" "
        f"-H \"Referer: https://order.hooters.com/locations/{city}\""
    )
    return curl_command
JavaScript code →
function getData(/** @type {JavaScriptRunContext} */ context) {
    function getCurlCommand(context) {
        const city = context.DataRow.GetString("city");
        const url = `https://order.hooters.com/api/vendors/search/${city}`;
             const curlCommand = `curl -X GET "${url}" ` +
            `-H "Accept: application/json, */*" ` +
            `-H "Accept-Language: en-US,en;q=0.9" ` +
            `-H "X-Olo-App-Platform: web" ` +
            `-H "X-Olo-Country: us" ` +
            `-H "X-Olo-Request: 1" ` +
            `-H "X-Olo-Viewport: Tablet" ` +
            `-H "X-Requested-With: XMLHttpRequest" ` +
            `-H "__RequestVerificationToken: " ` +
            `-H "sec-ch-ua: \\"Chromium\\";v=\\"105\\"" ` +
            `-H "sec-ch-ua-mobile: ?0" ` +
            `-H "sec-ch-ua-platform: \\"Windows\\"" ` +
            `-H "Referer: https://order.hooters.com/locations/${city}"`;
        return curlCommand;
    }
    return getCurlCommand(context);
}Encrypt: When selected, this checkbox encrypts the input field content, replacing the original text with its encrypted version to enhance data security. By default, it is unchecked.
Browser
Please refer to the “Browser” section for more insight.
Error Handling
Please refer to the “Error Handling” section for more insight.
Export
Please refer to the “Export” section for more insight.
